Difference between revisions of "Moa"

From EVE University Wiki
Jump to: navigation, search
(Corrected Training times)
Line 90: Line 90:
  
 
==Fitting==
 
==Fitting==
{{ShipFitting|
+
{{Fittings
ship=Moa|
+
|name=Brawler Moa
shipTypeID=623|
+
|high=Heavy Ion Blaster II<br>Heavy Ion Blaster II<br>Heavy Ion Blaster II<br>Heavy Ion Blaster II
fitName=Blaster Brawler|
+
|mid=Large Shield Extender II<br>Large Shield Extender II<br>Fleeting Propulsion Inhibitor I<br>Faint Epsilon Warp Scrambler I<br>Experimental 10MN Microwarpdrive I
fitID=Blaster-Brawler|
+
|low=Magnetic Field Stabilizer II<br>Magnetic Field Stabilizer II<br>Magnetic Field Stabilizer II<br>Damage Control II
high1name=Anode Ion Particle Cannon I|
+
|charges=Caldari Navy Antimatter Charge M
high1typeID=7669|
+
|drones=Warrior II
high2name=Anode Ion Particle Cannon I|
+
|rigs=Medium Anti-EM Screen Reinforcer I<br>Medium Core Defense Field Extender I<br>Medium Core Defense Field Extender I
high2typeID=7669|
+
|recommended1=
high3name=Anode Ion Particle Cannon I|
+
|recommended2=
high3typeID=7669|
+
|recommended3=
high4name=Anode Ion Particle Cannon I|
+
|notes=
high4typeID=7669|
+
}}{{Fittings
high5name=Anode Ion Particle Cannon I|
+
|name=ASB Moa
high5typeID=7669|
+
|high=Heavy Ion Blaster II<br>Heavy Ion Blaster II<br>Heavy Ion Blaster II<br>Heavy Ion Blaster II
mid1name=Large F-S9 Regolith Shield Induction|
+
|mid=X-Large Ancillary Shield Booster<br>Adaptive Invulnerability Field II<br>Fleeting Propulsion Inhibitor I<br>Faint Epsilon Warp Scrambler I<br>Experimental 10MN Microwarpdrive I
mid1typeID=8529|
+
|low=Co-Processor II<br>Magnetic Field Stabilizer II<br>Magnetic Field Stabilizer II<br>Pseudoelectron Containment Field I
mid2name=Experimental 10MN Microwarpdrive I|
+
|charges=Caldari Navy Antimatter Charge M<br>Navy Cap Booster 400
mid2typeID=5975|
+
|drones=Hobgoblin II
mid3name=Limited Adaptive Invulnerability Field I|
+
|rigs=Medium Ancillary Current Router I<br>Medium Anti-EM Screen Reinforcer I<br>Medium Anti-EM Screen Reinforcer I
mid3typeID=9632|
+
|recommended1=
mid4name=Limited Adaptive Invulnerability Field I|
+
|recommended2=
mid4typeID=9632|
+
|recommended3=
mid5name=Faint Epsilon Warp Scrambler I|
+
|notes=
mid5typeID=5443|
+
}}
low1name=Damage Control I|
 
low1typeID=2046|
 
low2name=Magnetic Field Stabilizer I|
 
low2typeID=9944|
 
low3name=Magnetic Field Stabilizer I|
 
low3typeID=9944|
 
low4name=Tracking Enhancer I|
 
low4typeID=1998|
 
drone1name=Hobgoblin II x3|
 
drone1typeID=2456|
 
drone2name=open|
 
drone3name=open|
 
drone4name=open|
 
drone5name=open|
 
charge1name=Caldari Navy Iron Charge M x1|
 
charge1typeID=23039|
 
charge2name=open|
 
charge3name=open|
 
charge4name=open|
 
charge5name=open|
 
rig1name=Medium Core Defense Field Extender I|
 
rig1typeID=31790|
 
rig2name=Medium Core Defense Field Extender I|
 
rig2typeID=31790|
 
rig3name=Medium Anti-EM Screen Reinforcer I|
 
rig3typeID=31718|
 
difficulty=0|
 
warsop=A|
 
warsopReason=|
 
version=RET 1.0|
 
shipDNA=623:7669;5:5443;1:5975;1:8529;1:9632;2:1998;1:2046;1:9944;2:31718;1:31790;2:2456;3:23039;1::|
 
skills=|
 
notes=Burn towards target while initial point is being established, then apply your DPS and scram.</li><li>This fit has significant fitting room, so module meta level can be increased.}}     {{ShipFitting|
 
ship=Moa|
 
shipTypeID=623|
 
fitName=T2 Blaster Brawler|
 
fitID=T2-Blaster-Brawler|
 
high1name=Heavy Ion Blaster II|
 
high1typeID=3138|
 
high2name=Heavy Ion Blaster II|
 
high2typeID=3138|
 
high3name=Heavy Ion Blaster II|
 
high3typeID=3138|
 
high4name=Heavy Ion Blaster II|
 
high4typeID=3138|
 
high5name=Heavy Ion Blaster II|
 
high5typeID=3138|
 
mid1name=Warp Scrambler II|
 
mid1typeID=448|
 
mid2name=Adaptive Invulnerability Field II|
 
mid2typeID=2281|
 
mid3name=Large Shield Extender II|
 
mid3typeID=3841|
 
mid4name=Large Shield Extender II|
 
mid4typeID=3841|
 
mid5name=Experimental 10MN Microwarpdrive I|
 
mid5typeID=5975|
 
low1name=Damage Control II|
 
low1typeID=2048|
 
low2name=Magnetic Field Stabilizer II|
 
low2typeID=10190|
 
low3name=Magnetic Field Stabilizer II|
 
low3typeID=10190|
 
low4name=Magnetic Field Stabilizer II|
 
low4typeID=10190|
 
drone1name=Hobgoblin II x3|
 
drone1typeID=2456|
 
drone2name=open|
 
drone3name=open|
 
drone4name=open|
 
drone5name=open|
 
charge1name=Antimatter Charge M x1|
 
charge1typeID=230|
 
charge2name=open|
 
charge3name=open|
 
charge4name=open|
 
charge5name=open|
 
rig1name=Medium Anti-EM Screen Reinforcer I|
 
rig1typeID=31718|
 
rig2name=Medium Core Defense Field Extender I|
 
rig2typeID=31790|
 
rig3name=Medium Core Defense Field Extender I|
 
rig3typeID=31790|
 
difficulty=1|
 
warsop=A|
 
warsopReason=|
 
version=RET 1.1|
 
shipDNA=623:3138;5:448;1:2281;2:3841;1:5975;1:2048;1:10190;3:31718;1:31790;2:2456;3:230;1::|
 
skills=|
 
notes=For logi-supported shield fleets.}}


==Tactics==
 
==Tactics==

Revision as of 20:37, 18 June 2013

EVE University Database
 
Ship Database
Moa
Moa
Caldari State
Caldari State
Standard Cruisers
Moa Class
RELATED UNI-WIKI REFERENCES

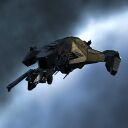
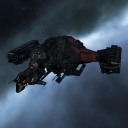
The Moa was designed as an all-out combat ship, and its heavy armament allows the Moa to tackle almost anything that floats in space. In contrast to its nemesis the Thorax, the Moa is most effective at long range where its railguns can rain death upon foes.

SHIP BONUSES

Traits:
Caldari Cruiser skill bonus per level:
5% bonus to Medium Hybrid Turret damage
4% bonus to shield resistances

Required Skills
  • Caldari Cruiser I41m
    • Spaceship Command II47m
    • Caldari Destroyer III8h 53m
      • Caldari Frigate III8h 53m
        • Spaceship Command I8m
Training Time what's this?
19h 22m
Estimated training time only for the listed skills based on zero implants and without neural remaps.
Grouping
▪ Variations
Eagle
Eagle.jpg
CornerT2s.png
Eagle
Heavy Assault Cruisers Moa Class
Icon hi slot.png5 (1/5) Icon mid slot.png6 Icon low slot.png4
Icon powergrid.png950 MW Icon cpu.png440 tf
Icon velocity.png160 m/sec
Icon capacity.png550 m³
, Onyx
Onyx.jpg
CornerT2s.png
Onyx
Heavy Interdiction Cruisers Moa Class
Icon hi slot.png6 (5/0) Icon mid slot.png6 Icon low slot.png4
Icon powergrid.png900 MW Icon cpu.png560 tf
Icon velocity.png200 m/sec
Icon capacity.png450 m³

Ship Attributes

Fittings
Powergrid
powergrid
850 MW
CPU
cpu output
380 tf
Capacitor
capacitor
1,500 GJ
High
high slots
5
Launchers
launcher slots
0
Turrets
turret slots
5
Medium
medium slots
5
Low
low slots
4
Rig
rigs
3
 
medium
Calibration
calibration
400
Navigation
Max Velocity
max. velocity
190 m/s
Inertia Modifier
inertia modifier (agility)
0.52
Warp Speed
inertia modifier (agility)
3 AU/s
Base Time to Warp
base time to warp
8.77 s
what's this?
Base Time to Warp is essentially the time needed for this ship to align and accelerate until it reaches 75% of its top speed and goes to warp. The time displayed here is the base calculated time with no account for any warp related skills, modules or any other effects.
Drones
Drone Capacity
drone capacity
15 m³
Drone Bandwidth
drone bandwidth
15 Mbit/sec
Targeting
Max Tgt. Range
max. targeting range
55 km
Max Locked Targets
max. locked targets
7
Gravimetric Sensor
Gravimetric sensor strength
17 points
Sig. Radius
signature radius
135 m
Scan Res.
scan resolution
260 mm
Structure
Structure Hitpoints
structure hitpoints
1,600 HP
Mass
ship mass
12,220,000 kg
Volume
ship volume
101,000 m³
Cargo Capacity
cargo capacity
450 m³
Armor
Armor Hitpoints
armor hitpoints
1,000 HP
Armor Resistances
EM
electromagnetic resistance
50
THR
thermal resistance
45
KIN
kinetic resistance
25
EXP
explosive resistance
10
Shields
Shield Capacity
shield hitpoints
2,300 HP
Shield Resistances
EM
electromagnetic resistance
0
THR
thermal resistance
20
KIN
kinetic resistance
40
EXP
explosive resistance
50


Summary

Contrary to what the Moa's (in-game) description says, it is most often used in PvP as a brawler, fit with blasters. It has quite a good shield tank, and can deal nice DPS.

For PvE, the Moa can be fit with rail guns and used for kiting.

Skills

Train up the usual Gunnery Support Skills

Fitting

Template:FittingsTemplate:Fittings

Tactics

No sub-article about Moa roles or piloting tactics. You can write them here.

Notes

You can write additional notes for Moa here.