More actions
No edit summary |
Zelda fera (talk | contribs) |
||
| Line 122: | Line 122: | ||
*Microwarpdrive, stasis webifier and warp scramble can be used all together to hold the target down while the thick tank keeps it alive before the arrival of its fleetmates. | *Microwarpdrive, stasis webifier and warp scramble can be used all together to hold the target down while the thick tank keeps it alive before the arrival of its fleetmates. | ||
*Two small neuts and the small sized guns should be enough to fend off frigate sized enemies, and the small nosferatu can be a life saver when the Maller is itself neuted by bigger ships. | *Two small neuts and the small sized guns should be enough to fend off frigate sized enemies, and the small nosferatu can be a life saver when the Maller is itself neuted by bigger ships. | ||
}} | |||
{{Fittings | |||
|name=Maller, Bait | |||
|high= | |||
Heavy Modulated Pulse Energy Beam I<br> | |||
Heavy Modulated Pulse Energy Beam I<br> | |||
Heavy Modulated Pulse Energy Beam I<br> | |||
Heavy Modulated Pulse Energy Beam I<br> | |||
Heavy Modulated Pulse Energy Beam I<br> | |||
|mid= | |||
Experimental 10MN MicroWarpdrive I<br> | |||
Faint Epsilon Warp Scrambler I<br> | |||
Fleeting Propulsion Inhibitor I | |||
|low= | |||
800mm Reinforced Steel Plates II<br> | |||
Adaptive Nano Plating II<br> | |||
Adaptive Nano Plating II<br> | |||
Damage Control II<br> | |||
Heat Sink II<br> | |||
Heat Sink II<br> | |||
|charges= | |||
Imperial Navy Multifrequency M | |||
|drones= | |||
Hobgoblin II<br> | |||
Hobgoblin II<br> | |||
Hobgoblin II<br> | |||
Hobgoblin II<br> | |||
|rigs= | |||
Medium Trimark Armor Pump I<br> | |||
Medium Anti-Kinetic Pump I<br> | |||
Medium energy Collision Accelerator I | |||
|recommended1= | |||
Amarr Cruiser IV<br> | |||
Gunnery III<br> | |||
Medium Energy Turret III<br> | |||
Propulsion Jamming I<br> | |||
High Speed Maneuvering I<br> | |||
|recommended2= | |||
Small Energy Turret III<br> | |||
Afterburner III<br> | |||
Hull Upgrades IV<br> | |||
Weapon Upgrades IV<br> | |||
|recommended3= | |||
Electronics III<br> | |||
Navigation III<br> | |||
Mechanics III<br> | |||
Jury Rigging III<br> | |||
Energy Weapon Rigging I<br> | |||
Armor Rigging I<br> | |||
Energy Weapon Rigging I<br> | |||
|notes= | |||
*Basic Maller PvP fit. | |||
*Microwarpdrive, stasis webifier and warp scramble can be used all together to hold the target down while the thick tank keeps it alive before the arrival of its fleetmates. | |||
}} | }} | ||
Revision as of 07:21, 7 December 2012
Fittings: Slot layout and stat changes

RELATED UNI-WIKI REFERENCES
|
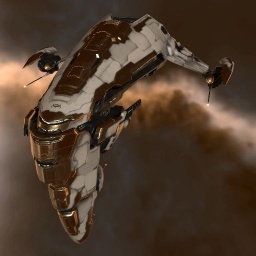
Quite possibly the toughest cruiser in the galaxy, the Maller is a common sight in Amarrian Imperial Navy operations. It is mainly used for military duty, although a few can be found in the private sector acting as escort ships for very important dispatches. SHIP BONUSES
Amarr Cruiser Skill Bonus:
Ship Attributes
|
Summary
You can write a summary for Maller here.
Skills
Further information about additional or recommended skills to pilot Maller for a specific or it's common role(s) can be written here.
Fitting
Tactics
No sub-article about Maller roles or piloting tactics. You can write them here.
Notes
This vessel qualifies for the University Ship Replacement Program, PYOS, and BYOM.


