notes=Cap skills (the first 3 recommended skills) are effectively mandatory. Booster must be 'pulsed' (used briefly when needed).</li><li>When fighting Angels it is highly recommended to swap the guns for 800mm ACs to better manage their close-range combat.</li><li>T2 guns (Arties or ACs) will fit with a 1%-3% CPU implant or by using at least one Faction Gyro.</li><li>Variants: Replace the Cap Recharger with a Cap Booster, a SeBo, or a 3rd Hardner. Drop the DC2 for another Gyro.</li><li>Other rigs to consider are the Large Core Defence Capacitor Safeguard and the Large Semiconductor Memory Cell.</li><li>As always, hardners, ammo and drones should be selected to match the rats' damage and weaknesses.}}
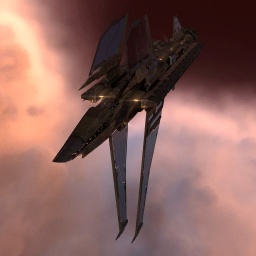
Development With the Maelstrom, versatility is the name of the game. Its defensive capabilities make it ideally suited for small raid groups or solo work, while its 8 turret hardpoints present opportunities for untold carnage on the fleet battlefield.
SHIP BONUSES
Minmatar Battleship bonuses (per skill level): 5% bonus to Large Projectile Turret rate of fire 7.5% bonus to Shield Booster amount
Estimated training time only for the listed skills based on zero implants and without neural remaps.
Grouping
▪ Variations
none
Ship Attributes
Fittings
Powergrid
21,000 MW
CPU
640 tf
Capacitor
6,000 GJ
High
8
Launchers
0
Turrets
8
Medium
6
Low
5
Rig
3
large
Calibration
400
Navigation
Max Velocity
94 m/sec
Inertia Modifier
0.136
Warp Speed
2 AU/s
Base Time to Warp
19.53 s
what's this?
Base Time to Warp is essentially the time needed for this ship to align and accelerate until it reaches 75% of its top speed and goes to warp. The time displayed here is the base calculated time with no account for any warp related skills, modules or any other effects.
Drones
Drone Capacity
100 m³
Drone Bandwidth
100 Mbit/sec
Targeting
Max Tgt. Range
75.00 km
Max Locked Targets
7
LADAR Sensor
21 points
Sig. Radius
460 m
Scan Res.
90 mm
Structure
Structure Hitpoints
7,000 HP
Mass
103,600,000 kg
Volume
472,500 m³
Cargo Capacity
550 m³
Frigate Escape Bay
1 Frigate
Armor
Armor Hitpoints
7,500 HP
Armor Resistances
EM
60
THR
35
KIN
25
EXP
10
Shields
Shield Capacity
8,000 HP
Shield Resistances
EM
0
THR
20
KIN
40
EXP
50
Summary
The Maelstrom is the usual choice for minmatar pilots running Level 4 missions, which it does quite well with its bonus to shield boosting. PvE Maelstroms usually fit an X-large shield booster for a powerful pulsed shield tank, and artillery for long-range DPS -- though against the Angel Cartel, whose battleships like to engage at close range, some pilots like to fit large autocannons instead.
In PvP the Maelstrom is the backbone of the "alpha fleet" - fleets designed to one-shot ships to negate the power of logistics.
Skills
Further information about additional or recommended skills to pilot Maelstrom for a specific or it's common role(s) can be written here.