Difference between revisions of "Drake"
m (Updated Warpspeed) |
m (Update variations= for Havoc expansion.) |
||
| (19 intermediate revisions by 13 users not shown) | |||
| Line 1: | Line 1: | ||
<onlyinclude>{{{{#if:{{{mode|}}}|{{#switch:{{{mode}}}|box=ShipBoxLarge|#default=ShipBoxTooltip}}|ShipArticle}} <!-- Template marker : DON'T EDIT LINE --> | <onlyinclude>{{{{#if:{{{mode|}}}|{{#switch:{{{mode}}}|box=ShipBoxLarge|#default=ShipBoxTooltip}}|ShipArticle}} <!-- Template marker : DON'T EDIT LINE --> | ||
<!----------------------------------------------------------- | <!----------------------------------------------------------- | ||
| − | * SHIP ATTRIBUTES SECTION (last update : | + | * SHIP ATTRIBUTES SECTION (last update : 2019-10-16) |
------------------------------------------------------------- | ------------------------------------------------------------- | ||
* on editing the attributes, please make sure that you don't | * on editing the attributes, please make sure that you don't | ||
| − | * leave/ | + | * leave/mistype any tags required. please follow the same |
* format below and edit only the values (after the = sign). | * format below and edit only the values (after the = sign). | ||
-------------------------------------------------------------> | -------------------------------------------------------------> | ||
| Line 10: | Line 10: | ||
| shipimg=Drake.jpg | | shipimg=Drake.jpg | ||
| shipname=Drake | | shipname=Drake | ||
| − | |||
| class=Combat Battlecruiser | | class=Combat Battlecruiser | ||
| grouping=Standard Battlecruisers | | grouping=Standard Battlecruisers | ||
| hulltype=Drake Class | | hulltype=Drake Class | ||
| − | | faction=Caldari State | + | | faction=Caldari State |
| − | + | | variations={{Ship|Nighthawk}}, {{Ship|Drake Navy Issue}}, {{Ship|Alligator}} | |
| − | + | | tech= | |
| − | | variations={{Ship|Nighthawk}}, {{Ship|Drake Navy Issue}} | + | | powergrid=830 MW |
| − | | tech= | ||
| − | |||
| − | | powergrid= | ||
| cpu=500 tf | | cpu=500 tf | ||
| capacitor=2,500 GJ | | capacitor=2,500 GJ | ||
| Line 28: | Line 24: | ||
| mediums=6 | | mediums=6 | ||
| lows=4 | | lows=4 | ||
| − | | mass= | + | | mass=13,500,000 kg |
| − | | volume=252,000 | + | | volume=252,000 m³ |
| − | | cargohold=450 | + | | cargohold=450 m³ |
| extrahold= | | extrahold= | ||
| extraholdtype= | | extraholdtype= | ||
| − | | dronebay=25 | + | | dronebay=25 m³ |
| bandwidth=25 Mbit/sec | | bandwidth=25 Mbit/sec | ||
| − | | info= | + | | info=Of the meticulous craftsmanship the Caldari are renowned for, the Drake was born. It was found beneath such a ship to rely on anything other than the time-honored combat tradition of missile fire, while the inclusion of sufficient CPU capabilities for decent electronic warfare goes without saying. |
| − | | bonuses=<b>Caldari Battlecruiser bonuses (per skill level):</b><br>4% bonus to all shield resistances<br>10% bonus to kinetic Heavy Missile and Heavy Assault Missile damage<br><b>Role Bonus:</b><br> | + | | bonuses=<b>Caldari Battlecruiser bonuses (per skill level):</b><br>4% bonus to all shield resistances<br>10% bonus to kinetic Heavy Missile and Heavy Assault Missile damage<br><b>Role Bonus:</b><br>• Can use one Command Burst module<br>25% bonus to Missile velocity<br>50% bonus to Command Burst area of effect range<br> |
| structurehp=3,750 HP | | structurehp=3,750 HP | ||
| − | | shieldhp=5, | + | | shieldhp=5,500 HP |
| shieldem=0 | | shieldem=0 | ||
| shieldexp=50 | | shieldexp=50 | ||
| Line 48: | Line 44: | ||
| armorkin=25 | | armorkin=25 | ||
| armortherm=45 | | armortherm=45 | ||
| − | | maxvelocity= | + | | maxvelocity=150 m/sec |
| − | | inertia=0. | + | | inertia=0.65 |
| − | | warpspeed= | + | | warpspeed=3.5 AU/s |
| − | | warptime= | + | | warptime=12.16 s |
| − | | targetrange= | + | | targetrange=65.00 km |
| sigradius=295 m | | sigradius=295 m | ||
| maxlockedtargets=8 | | maxlockedtargets=8 | ||
| Line 59: | Line 55: | ||
| scanres=195 mm | | scanres=195 mm | ||
| reqskills=*{{RequiredSkill|Caldari Battlecruiser|I}} | | reqskills=*{{RequiredSkill|Caldari Battlecruiser|I}} | ||
| − | **{{RequiredSkill|Spaceship Command|III}} | + | ** {{RequiredSkill|Spaceship Command|III}} |
| − | **{{RequiredSkill|Caldari Cruiser|III}} | + | ** {{RequiredSkill|Caldari Cruiser|III}} |
| − | ***{{RequiredSkill|Spaceship Command|II}} | + | *** {{RequiredSkill|Spaceship Command|II}} |
| − | ***{{RequiredSkill|Caldari Destroyer|III}} | + | *** {{RequiredSkill|Caldari Destroyer|III}} |
| − | ****{{RequiredSkill|Caldari Frigate|III}} | + | **** {{RequiredSkill|Caldari Frigate|III}} |
| − | *****{{RequiredSkill|Spaceship Command|I}} | + | ***** {{RequiredSkill|Spaceship Command|I}} |
| totaltraintime=1d 21h 16m 40s | | totaltraintime=1d 21h 16m 40s | ||
| forumlinks= | | forumlinks= | ||
| wikireferences= | | wikireferences= | ||
| − | | externallinks= | + | | externallinks= |
| − | | highlights1=Can | + | | highlights1=Can use Command Burst module |
| highlights2=High Amount of High Slots | | highlights2=High Amount of High Slots | ||
| highlights3= | | highlights3= | ||
| Line 80: | Line 76: | ||
-------------------------------------------------------------------------------------------> | -------------------------------------------------------------------------------------------> | ||
| − | ==Summary== | + | == Summary == |
| − | The '''Drake''', well-known for its excellent tanking abilities, is a very popular PvE | + | The '''Drake''', well-known for its excellent tanking abilities, is a very popular PvE ship. In PvE, the Drake can be passively shield-tanked for a stronger tank than a battleship, making L3 missions easy and L4 missions a possibility. However, without very good missile skills L4's will take a long time. |
| − | + | While the Drake was long ago common in PvP fleets, a nerf by CCP has made the Drake unpopular in PvP. It can be fitted with a durable shield buffer tank, but it receives a damage bonus only for kinetic missiles, reducing its flexibility. With Heavy Missile Launchers the DPS of a Drake is not very impressive for a battlecruiser, but it has a long range for its class. | |
The Drake is quite easy to skill for and pilot competently. Its tank bonus makes it forgiving of mistakes, and missiles are an easy to use weapon system that doesn't require the pilot to worry much about angular velocity and range. While it's easy to make it a ''good'' L3 mission boat, it's hard to make it ''fantastic'': it is quite slow, without T2 launchers and ammo it only does okay DPS, and clever piloting can't be used to increase missile damage like it can with turrets. | The Drake is quite easy to skill for and pilot competently. Its tank bonus makes it forgiving of mistakes, and missiles are an easy to use weapon system that doesn't require the pilot to worry much about angular velocity and range. While it's easy to make it a ''good'' L3 mission boat, it's hard to make it ''fantastic'': it is quite slow, without T2 launchers and ammo it only does okay DPS, and clever piloting can't be used to increase missile damage like it can with turrets. | ||
| − | ==Skills== | + | == Skills == |
{| class="wikitable" | {| class="wikitable" | ||
| Line 99: | Line 95: | ||
| | | | ||
* 4% bonus to all shield resistances | * 4% bonus to all shield resistances | ||
| − | * 10% bonus to Kinetic Heavy Missile Heavy | + | * 10% bonus to Kinetic Heavy Missile Heavy Assault Missile damage |
| While you can start missioning with this skill at III, skilling to at least IV will provide a foundation of decent [[tank]] and decent [[DPS]]. | | While you can start missioning with this skill at III, skilling to at least IV will provide a foundation of decent [[tank]] and decent [[DPS]]. | ||
|- | |- | ||
| Line 136: | Line 132: | ||
| | | | ||
* 10% decrease per level in factor of target's velocity for all missiles. | * 10% decrease per level in factor of target's velocity for all missiles. | ||
| − | | Even though this skill doesn't increase on-paper DPS, it does increase your actual in-game damage application. As a target's speed becomes less of a factor, more damage is applied. This is especially helpful against smaller, faster ships. If you're more familiar with turrets, this is | + | | Even though this skill doesn't increase on-paper DPS, it does increase your actual in-game damage application. As a target's speed becomes less of a factor, more damage is applied. This is especially helpful against smaller, faster ships. If you're more familiar with turrets, this is analogous to better tracking speed. |
|- | |- | ||
| {{sk|Missile Bombardment|IV|icon=yes}} | | {{sk|Missile Bombardment|IV|icon=yes}} | ||
| Line 146: | Line 142: | ||
| {{sk|Weapon Upgrades|IV|icon=yes}} | | {{sk|Weapon Upgrades|IV|icon=yes}} | ||
| | | | ||
| − | * 5% reduction per skill level in the CPU needs of weapon turrets, launchers and smartbombs. | + | * 5% reduction per skill level in the CPU needs of weapon turrets, launchers, and smartbombs. |
| Helps with fitting a ship by decreasing the (often large) CPU requirements of weapons. | | Helps with fitting a ship by decreasing the (often large) CPU requirements of weapons. | ||
|- | |- | ||
| Line 177: | Line 173: | ||
| This skill helps with fitting shields to your ship by reducing how much power they need. Training it to IV allows for the use of T2 shield extenders, T2 passive shield hardeners, T2 shield rechargers | | This skill helps with fitting shields to your ship by reducing how much power they need. Training it to IV allows for the use of T2 shield extenders, T2 passive shield hardeners, T2 shield rechargers | ||
|- | |- | ||
| − | | {{sk|EM Shield Compensation|IV|icon=yes}}, {{sk| | + | | {{sk|EM Shield Compensation|IV|icon=yes}}, {{sk|Thermal Shield Compensation|IV|icon=yes}}, {{sk|Kinetic Shield Compensation|IV|icon=yes}}, {{sk|Explosive Shield Compensation|IV|icon=yes}} |
| | | | ||
* 5% bonus to resistance per level for Shield Amplifiers | * 5% bonus to resistance per level for Shield Amplifiers | ||
| Line 217: | Line 213: | ||
| | | | ||
* Allows use of Heavy Missile Launcher II and T2 Heavy Missiles | * Allows use of Heavy Missile Launcher II and T2 Heavy Missiles | ||
| − | | This train may not be worth it if you're just leveling up to Level 4 missions. However if you've got a [[Tengu]] in your future, or if you're grinding Level 3 missions for standings, you'll want to train this sooner rather than later. | + | | This train may not be worth it if you're just leveling up to Level 4 missions. However, if you've got a [[Tengu]] in your future, or if you're grinding Level 3 missions for standings, you'll want to train this sooner rather than later. |
|- | |- | ||
| {{sk|Heavy Assault Missiles|V|icon=yes}}, {{sk|Heavy Assault Missile Specialization|IV|icon=yes}}, {{sk|Missile Launcher Operation|V|icon=yes}} | | {{sk|Heavy Assault Missiles|V|icon=yes}}, {{sk|Heavy Assault Missile Specialization|IV|icon=yes}}, {{sk|Missile Launcher Operation|V|icon=yes}} | ||
| Line 237: | Line 233: | ||
| | | | ||
* Allows T2 Gallente light drones. | * Allows T2 Gallente light drones. | ||
| − | | Substitute any other racial variant | + | | Substitute any other racial variant for the Drone Specialization skill. If you want to squeeze the most DPS out of the Drake's tiny drone bay, T2 drones are the way to go. They're expensive but worth it. They're superior to T1 drones in almost every way. |
|- | |- | ||
| {{sk|Hull Upgrades|IV|icon=yes}} | | {{sk|Hull Upgrades|IV|icon=yes}} | ||
| Line 245: | Line 241: | ||
|} | |} | ||
| − | This list of skills may seem daunting at first, but you don't need all them to start doing things! Make it up as you go -- start doing what you want to do and figure out where you need to go from there. You may start with weak shield and weak missile DPS, but you can have fun right away. | + | This list of skills may seem daunting at first, but you don't need all of them to start doing things! Make it up as you go -- start doing what you want to do and figure out where you need to go from there. You may start with a weak shield and weak missile DPS, but you can have fun right away. |
Remember as well that all of these skills are useful for fitting other ships. You're not going to somehow outgrow these skills, even if you outgrow your Drake. | Remember as well that all of these skills are useful for fitting other ships. You're not going to somehow outgrow these skills, even if you outgrow your Drake. | ||
| − | == | + | == Tactics == |
| − | + | If you are coming to the Drake from L2 missions, you are probably used to flying into the middle of the NPCs and killing everything. That's a good way to get yourself killed in an L3 mission; many feature enough NPC firepower to overwhelm even a Drake's tank. Here are a few pointers to start L3 missioning in a Drake: | |
| − | + | * If the mission is unfamiliar to you, read about it on [http://eve-survival.org/ EVE-Survival]. | |
| − | + | * Because the Drake is almost always passively tanked, you have no tools apart from running to mitigate excessive damage. If your shield drops to 50%, align to a celestial and start your afterburner. If it drops to the 25% alarm, warp out, dock, and then come back for more later. When you do come back, warp in at a long range (like 50 or 100km). | |
| − | + | ** Remember that the Drake is big and slow. You won't be able to sig tank or speed tank incoming damage. Range can be one the most effective ways of mitigating incoming DPS while piloting a Drake. | |
| − | + | * Shoot the biggest NPCs first (usually other Battlecruisers); they're the ones damaging you the most. | |
| − | + | ** However if you're out of range of the Battlecruisers and you're being hit by something else, shoot that instead, | |
| − | + | * Against Sansha and Blood Raiders, use Mjolnir Heavy Missiles unless you have Caldari Battlecruiser V. In all other cases, use Scourge Heavy Missiles. | |
| − | + | * Orbiting the NPC blob at 30km works reasonably well. | |
| − | |||
| − | |||
| − | |||
| − | |||
| − | |||
| − | |||
| − | |||
| − | |||
| − | |||
| − | |||
| − | |||
| − | |||
| − | |||
| − | |||
| − | |||
| − | |||
| − | |||
| − | |||
| − | |||
| − | |||
| − | |||
| − | |||
| − | |||
| − | |||
| − | |||
| − | |||
| − | |||
| − | |||
| − | |||
| − | |||
| − | |||
| − | |||
| − | |||
| − | |||
| − | |||
| − | |||
| − | |||
| − | |||
| − | |||
| − | |||
| − | |||
| − | |||
| − | |||
| − | |||
| − | |||
| − | |||
| − | |||
| − | |||
| − | |||
| − | |||
| − | |||
| − | |||
| − | |||
| − | |||
| − | |||
| − | |||
| − | |||
| − | |||
| − | |||
| − | |||
| − | |||
| − | |||
| − | |||
| − | |||
| − | |||
| − | |||
| − | |||
| − | |||
| − | |||
| − | |||
| − | |||
| − | |||
| − | |||
| − | |||
| − | |||
| − | |||
| − | |||
| − | |||
| − | |||
| − | |||
| − | |||
| − | |||
| − | |||
| − | |||
| − | |||
| − | |||
| − | |||
| − | |||
| − | |||
| − | |||
| − | |||
| − | |||
| − | |||
| − | |||
| − | |||
| − | |||
| − | |||
| − | |||
| − | |||
| − | |||
| − | |||
| − | |||
| − | |||
| − | |||
| − | |||
| − | |||
| − | |||
| − | |||
| − | |||
| − | |||
| − | |||
| − | |||
| − | |||
| − | |||
| − | |||
| − | |||
| − | |||
| − | |||
| − | |||
| − | |||
| − | |||
| − | |||
| − | |||
| − | |||
| − | |||
| − | |||
| − | |||
| − | |||
| − | |||
| − | |||
| − | |||
| − | |||
| − | |||
| − | |||
| − | |||
| − | |||
| − | |||
| − | |||
| − | |||
| − | |||
| − | |||
| − | |||
| − | |||
| − | |||
| − | |||
| − | |||
| − | |||
| − | |||
| − | |||
| − | |||
| − | |||
| − | |||
| − | |||
| − | |||
| − | |||
| − | |||
| − | |||
| − | |||
| − | |||
| − | |||
| − | |||
| − | |||
| − | |||
| − | |||
| − | |||
| − | |||
| − | |||
| − | |||
| − | |||
| − | |||
| − | |||
| − | |||
| − | |||
| − | |||
| − | |||
| − | |||
| − | |||
| − | |||
| − | |||
| − | |||
| − | |||
| − | |||
| − | |||
| − | |||
| − | |||
| − | |||
| − | |||
| − | |||
| − | |||
| − | |||
| − | |||
| − | |||
| − | |||
| − | |||
| − | |||
| − | |||
| − | |||
| − | |||
| − | |||
| − | |||
| − | |||
| − | |||
| − | |||
| − | |||
| − | |||
| − | |||
| − | |||
| − | |||
| − | |||
| − | |||
| − | |||
| − | |||
| − | |||
| − | |||
| − | |||
| − | |||
| − | |||
| − | |||
| − | |||
| − | |||
| − | |||
| − | |||
| − | |||
| − | |||
| − | |||
| − | |||
| − | |||
| − | |||
| − | |||
| − | |||
| − | |||
| − | |||
| − | |||
| − | |||
| − | |||
| − | |||
| − | |||
| − | |||
| − | |||
| − | |||
| − | |||
| − | |||
| − | |||
| − | |||
| − | |||
| − | |||
| − | |||
| − | |||
| − | |||
| − | |||
| − | |||
| − | |||
| − | |||
| − | |||
| − | |||
| − | |||
| − | |||
| − | |||
| − | |||
| − | |||
| − | |||
| − | |||
| − | |||
| − | |||
| − | |||
| − | |||
| − | |||
| − | |||
| − | |||
| − | |||
| − | |||
| − | |||
| − | |||
| − | |||
| − | |||
| − | |||
| − | |||
| − | |||
| − | |||
| − | |||
| − | |||
| − | |||
| − | |||
| − | |||
| − | |||
| − | |||
| − | |||
| − | |||
| − | |||
| − | |||
| − | |||
| − | |||
| − | |||
| − | |||
| − | |||
| − | |||
| − | |||
| − | |||
| − | |||
| − | |||
| − | |||
| − | |||
| − | |||
| − | |||
| − | |||
| − | |||
| − | |||
| − | |||
| − | |||
| − | |||
| − | == | + | == Notes == |
| − | + | The name of the Drake could have come from the legendary English explorer and pirate, but given the avian theme of the Caldari ships, it is more likely that the ship was named for the official name of a male duck. | |
| − | + | ||
| − | + | == Patch History == | |
| − | + | {{Expansion past| | |
| − | + | '''October 2019 Release - 2019-10-15.1''' | |
| − | + | ||
| − | + | ''Every Cruiser, Battlecruiser and Battleship now warps faster than before.'' | |
| − | |||
| − | + | * Warp Speed increased from 2.7 AU/s to 3.5 AU/s (+0.8 AU/s) | |
| − | + | }} | |
{{ShipsMatrix}} | {{ShipsMatrix}} | ||
| − | + | ||
| + | [[Category:Ship Database]] | ||
| + | [[Category:Standard Battlecruisers]] | ||
Latest revision as of 13:16, 14 November 2023


Can use Command Burst module
HIGHLIGHTS
High Amount of High Slots
HIGHLIGHTS
RELATED UNI-WIKI REFERENCES
|
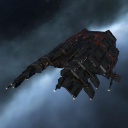
Of the meticulous craftsmanship the Caldari are renowned for, the Drake was born. It was found beneath such a ship to rely on anything other than the time-honored combat tradition of missile fire, while the inclusion of sufficient CPU capabilities for decent electronic warfare goes without saying. SHIP BONUSES
Caldari Battlecruiser bonuses (per skill level):
Ship Attributes
|
Summary
The Drake, well-known for its excellent tanking abilities, is a very popular PvE ship. In PvE, the Drake can be passively shield-tanked for a stronger tank than a battleship, making L3 missions easy and L4 missions a possibility. However, without very good missile skills L4's will take a long time.
While the Drake was long ago common in PvP fleets, a nerf by CCP has made the Drake unpopular in PvP. It can be fitted with a durable shield buffer tank, but it receives a damage bonus only for kinetic missiles, reducing its flexibility. With Heavy Missile Launchers the DPS of a Drake is not very impressive for a battlecruiser, but it has a long range for its class.
The Drake is quite easy to skill for and pilot competently. Its tank bonus makes it forgiving of mistakes, and missiles are an easy to use weapon system that doesn't require the pilot to worry much about angular velocity and range. While it's easy to make it a good L3 mission boat, it's hard to make it fantastic: it is quite slow, without T2 launchers and ammo it only does okay DPS, and clever piloting can't be used to increase missile damage like it can with turrets.
Skills
| Skill & Level | Effect | Explanation | |
|---|---|---|---|
Base Skills |
|
While you can start missioning with this skill at III, skilling to at least IV will provide a foundation of decent tank and decent DPS. | |
|
Heavy Missiles, due to their long range, are often used in Level 3 mission fits. Train to IV to maximise your time/benefit ratio. | ||
|
Drakes are used in Factional Warfare PvP, often fit with Heavy Assault Missiles. Heavy Assault Missiles have a shorter range than Heavy Missiles. | ||
Missile Skills |
|
This skill is required to operate any rocket or missile launcher. Training it also increases your rate of fire, which means more damage dealt per second. | |
|
Rapid Launch increases your rate of fire, increasing damage dealt per second. | ||
|
Simply deals a direct increase to damage dealt. | ||
|
While this skill decreases the time it takes for missiles to actually deal their damage, it also increases their range. A missile that travels faster is a missile that travels further. | ||
|
Even though this skill doesn't increase on-paper DPS, it does increase your actual in-game damage application. As a target's speed becomes less of a factor, more damage is applied. This is especially helpful against smaller, faster ships. If you're more familiar with turrets, this is analogous to better tracking speed. | ||
|
Like Missile Projection, this skill increases range, just in a different way. Instead of making your missiles faster, it makes them fly longer. | ||
Support Skills |
|
Helps with fitting a ship by decreasing the (often large) CPU requirements of weapons. | |
| Skills:Engineering |
|
Engineering skills as needed to fit your ship properly. | |
Shield Skills |
|
This basic shield skill allows you to fit shields but also helps with passive buffer tanks that rely on shield regeneration to tank incoming DPS. | |
|
This skill gives a bonus to shield capacity. Larger shield capacity allows for more shield regeneration, again helping passive buffer tanks. | ||
|
This skill reduces the change of damage "leakage" between shields and armor. Training it to IV allows for the use of T2 active shield hardeners, one of the building blocks of a good T2 shield tank. | ||
|
This skill helps with fitting shields to your ship by reducing how much power they need. Training it to IV allows for the use of T2 shield extenders, T2 passive shield hardeners, T2 shield rechargers | ||
|
Improves the effectiveness of passive shield hardeners. | ||
Drone Skills |
|
Train Drones to V to operate 5 drones. It's important to have a full set of Drones to maximize the effectiveness of your Drake, especially against smaller targets that your Heavy Missiles might have a harder time killing. The Drake only has enough drone bandwidth and dronebay to support 5 light drones, but skilling up those 5 drones can help increase your effectiveness greatly. | |
|
Increase the effectiveness of your drones by making their pew pew more powerful. | ||
|
Useful if you want to attack things that are far away. | ||
|
Helps your drones get to their targets faster. | ||
|
Drones are pretty fragile. This skill will make them a little less fragile, but only a little less. | ||
|
This skill is important for sentry drones (due to their immobility) in particular, but can provide a little boost for combat drones as well, despite combat drones having MWDs. | ||
Advanced Skills |
|
This train may not be worth it if you're just leveling up to Level 4 missions. However, if you've got a Tengu in your future, or if you're grinding Level 3 missions for standings, you'll want to train this sooner rather than later. | |
|
Same as above. | ||
|
Like Target Navigation Prediction, this skill helps take the edge off smaller targets. This is in the advanced skill category as it requires Missile Launcher Operation V as a prerequisite. | ||
|
If you're going to try to fit T2 launchers on a Drake, you're probably going to want this. These skills will also make fitting many other ships much easier. | ||
|
Substitute any other racial variant for the Drone Specialization skill. If you want to squeeze the most DPS out of the Drake's tiny drone bay, T2 drones are the way to go. They're expensive but worth it. They're superior to T1 drones in almost every way. | ||
|
Although many Drake fits do not use a DCII module, it can be useful in some cases. |
This list of skills may seem daunting at first, but you don't need all of them to start doing things! Make it up as you go -- start doing what you want to do and figure out where you need to go from there. You may start with a weak shield and weak missile DPS, but you can have fun right away.
Remember as well that all of these skills are useful for fitting other ships. You're not going to somehow outgrow these skills, even if you outgrow your Drake.
Tactics
If you are coming to the Drake from L2 missions, you are probably used to flying into the middle of the NPCs and killing everything. That's a good way to get yourself killed in an L3 mission; many feature enough NPC firepower to overwhelm even a Drake's tank. Here are a few pointers to start L3 missioning in a Drake:
- If the mission is unfamiliar to you, read about it on EVE-Survival.
- Because the Drake is almost always passively tanked, you have no tools apart from running to mitigate excessive damage. If your shield drops to 50%, align to a celestial and start your afterburner. If it drops to the 25% alarm, warp out, dock, and then come back for more later. When you do come back, warp in at a long range (like 50 or 100km).
- Remember that the Drake is big and slow. You won't be able to sig tank or speed tank incoming damage. Range can be one the most effective ways of mitigating incoming DPS while piloting a Drake.
- Shoot the biggest NPCs first (usually other Battlecruisers); they're the ones damaging you the most.
- However if you're out of range of the Battlecruisers and you're being hit by something else, shoot that instead,
- Against Sansha and Blood Raiders, use Mjolnir Heavy Missiles unless you have Caldari Battlecruiser V. In all other cases, use Scourge Heavy Missiles.
- Orbiting the NPC blob at 30km works reasonably well.
Notes
The name of the Drake could have come from the legendary English explorer and pirate, but given the avian theme of the Caldari ships, it is more likely that the ship was named for the official name of a male duck.
Patch History
| A long, long time ago... |
|---|
|
October 2019 Release - 2019-10-15.1 Every Cruiser, Battlecruiser and Battleship now warps faster than before.
|