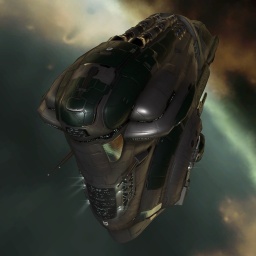
|
|
| Line 90: |
Line 90: |
|
| |
|
| ==Fitting== | | ==Fitting== |
| {{Fittings | | {{:Dominix/Fittings/Basic}} |
| |name=Dominix, Mission Dual LAR
| |
| | |
| |high=
| |
| Dual 250mm Prototype I Gauss Gun<br>
| |
| Dual 250mm Prototype I Gauss Gun<br>
| |
| Dual 250mm Prototype I Gauss Gun<br>
| |
| Dual 250mm Prototype I Gauss Gun<br>
| |
| Dual 250mm Prototype I Gauss Gun<br>
| |
| Drone Link Augmentor I
| |
| |mid=
| |
| Cap Recharger II<br>
| |
| Cap Recharger II<br>
| |
| Cap Recharger II<br>
| |
| Cap Recharger II<br>
| |
| Cap Recharger II
| |
| |low=
| |
| Large Armor Repairer II<br>
| |
| Large Armor Repairer II<br>
| |
| Armor Kinetic Hardener II<br>
| |
| Armor Explosive Hardener II<br>
| |
| Armor Explosive Hardener II<br>
| |
| Damage Control II<br>
| |
| Energized Adaptive Nano Membrane II
| |
| | |
| |charges=
| |
| Antimatter Charge L
| |
| |drones=
| |
| Warrior II x5<br>
| |
| Valkyrie II x5<br>
| |
| Berserker I x5<br>
| |
| Bouncer I x5
| |
| |rigs=
| |
| Large Capacitor Control Circuit I<br>
| |
| Large Capacitor Control Circuit I<br>
| |
| Large Capacitor Control Circuit I
| |
| | |
| |recommended1=
| |
| Acceleration Control III<br>
| |
| Afterburner IV<br>
| |
| Combat Drone Operation IV<br>
| |
| Controlled Bursts III<br>
| |
| Drone Durability III<br>
| |
| Drone Interfacing IV<br>
| |
| Drone Navigation IV<br>
| |
| Drone Sharpshooting IV<br>
| |
| Drones V<br>
| |
| Electronics IV<br>
| |
| EM Armor Compensation III<br>
| |
| Energy Grid Upgrades III<br>
| |
| Energy Management IV<br>
| |
| Energy Systems Operation IV<br>
| |
| Engineering V<br>
| |
| Evasive Maneuvering III
| |
| |recommended2=
| |
| Explosive Armor Compensation III<br>
| |
| Fuel Conservation III<br>
| |
| Gallente Battleship IV<br>
| |
| Gallente Cruiser IV<br>
| |
| Gallente Drone Specialization II<br>
| |
| Gallente Frigate IV<br>
| |
| Gunnery V<br>
| |
| Heavy Drone Operation IV<br>
| |
| Hull Upgrades V<br>
| |
| Jury Rigging I<br>
| |
| Kinetic Armor Compensation III<br>
| |
| Large Hybrid Turret IV<br>
| |
| Long Range Targeting III<br>
| |
| Mechanic V<br>
| |
| Medium Hybrid Turret III<br>
| |
| Minmatar Drone Specialization II
| |
| |recommended3=
| |
| Motion Prediction IV<br>
| |
| Navigation IV<br>
| |
| Rapid Firing IV<br>
| |
| Repair Systems IV<br>
| |
| Scout Drone Operation V<br>
| |
| Sentry Drone Interfacing IV<br>
| |
| Sharpshooter IV<br>
| |
| Signature Analysis III<br>
| |
| Small Hybrid Turret III<br>
| |
| Spaceship Command IV<br>
| |
| Surgical Strike III<br>
| |
| Targeting IV<br>
| |
| Thermic Armor Compensation III<br>
| |
| Trajectory Analysis III
| |
| | |
| |notes=
| |
| * The example fitting has drones and hardeners fitted for Angel Cartel rats.
| |
| * The Damage Control can be changed to a third hardener (explosive or thermal, as some angel missions have more thermal damage than others), or to an EANM (if you have high armor compensation skills), or a tracking enhancer to help your guns track close-orbiting ships and to reach those who stay further away more easily (as the lack of AB makes range control difficult).
| |
| }}
| |
| | |
| {{Fittings
| |
| |name=Dominix, Mission Single LAR
| |
| | |
| |high=
| |
| Dual 250mm Prototype I Gauss Gun<br>
| |
| Dual 250mm Prototype I Gauss Gun<br>
| |
| Dual 250mm Prototype I Gauss Gun<br>
| |
| Dual 250mm Prototype I Gauss Gun<br>
| |
| Dual 250mm Prototype I Gauss Gun<br>
| |
| Drone Link Augmentor I
| |
| |mid=
| |
| 100MN Afterburner II<br>
| |
| Cap Recharger II<br>
| |
| Cap Recharger II<br>
| |
| Cap Recharger II<br>
| |
| Cap Recharger II
| |
| |low=
| |
| Magnetic Field Stabilizer II<br>
| |
| Magnetic Field Stabilizer II<br>
| |
| Large Armor Repairer II<br>
| |
| Energized Adaptive Nano Membrane II<br>
| |
| Armor Kinetic Hardener II<br>
| |
| Armor Explosive Hardener II<br>
| |
| Armor Explosive Hardener II
| |
| | |
| |charges=
| |
| Antimatter Charge L
| |
| |drones=
| |
| Warrior II x5<br>
| |
| Valkyrie II x5<br>
| |
| Berserker I x5<br>
| |
| Bouncer I x5
| |
| |rigs=
| |
| Large Capacitor Control Circuit I<br>
| |
| Large Capacitor Control Circuit I<br>
| |
| Large Capacitor Control Circuit I
| |
| | |
| |recommended1=
| |
| Acceleration Control III<br>
| |
| Afterburner IV<br>
| |
| Combat Drone Operation IV<br>
| |
| Controlled Bursts III<br>
| |
| Drone Durability III<br>
| |
| Drone Interfacing IV<br>
| |
| Drone Navigation IV<br>
| |
| Drone Sharpshooting IV<br>
| |
| Drones V<br>
| |
| Electronics IV<br>
| |
| EM Armor Compensation III<br>
| |
| Energy Grid Upgrades III<br>
| |
| Energy Management IV<br>
| |
| Energy Systems Operation IV<br>
| |
| Engineering V<br>
| |
| Evasive Maneuvering III
| |
| |recommended2=
| |
| Explosive Armor Compensation III<br>
| |
| Fuel Conservation III<br>
| |
| Gallente Battleship IV<br>
| |
| Gallente Cruiser IV<br>
| |
| Gallente Drone Specialization II<br>
| |
| Gallente Frigate IV<br>
| |
| Gunnery V<br>
| |
| Heavy Drone Operation IV<br>
| |
| Hull Upgrades V<br>
| |
| Jury Rigging I<br>
| |
| Kinetic Armor Compensation III<br>
| |
| Large Hybrid Turret IV<br>
| |
| Long Range Targeting III<br>
| |
| Mechanic V<br>
| |
| Medium Hybrid Turret III<br>
| |
| Minmatar Drone Specialization II
| |
| |recommended3=
| |
| Motion Prediction IV<br>
| |
| Navigation IV<br>
| |
| Rapid Firing IV<br>
| |
| Repair Systems IV<br>
| |
| Scout Drone Operation V<br>
| |
| Sentry Drone Interfacing IV<br>
| |
| Sharpshooter IV<br>
| |
| Signature Analysis III<br>
| |
| Small Hybrid Turret III<br>
| |
| Spaceship Command IV<br>
| |
| Surgical Strike III<br>
| |
| Targeting IV<br>
| |
| Thermic Armor Compensation III<br>
| |
| Trajectory Analysis III
| |
| | |
| |notes=
| |
| * The example fitting has drones and hardeners fitted for Angel Cartel rats.
| |
| * The afterburner is used to get close to antimatter optimal range, since some rat battleships are faster than a dominix with no propulsion module. It also helps keep angular velocity low to avoid tracking problems.
| |
| }}
| |
| | |
| {{Fittings
| |
| |name=Dominix, PvP Neut
| |
| | |
| |high=
| |
| Heavy Unstable Power Fluctuator I<br>
| |
| Heavy Unstable Power Fluctuator I<br>
| |
| Heavy Unstable Power Fluctuator I<br>
| |
| Medium Energy Neutralizer II<br>
| |
| Medium Energy Neutralizer II<br>
| |
| Medium Energy Neutralizer II<br>
| |
| |mid=
| |
| Prototype 100MN MicroWarpdrive I<br>
| |
| Heavy Electrochemical Capacitor Booster I<br>
| |
| Heavy Electrochemical Capacitor Booster I<br>
| |
| Stasis Webifier II<br>
| |
| Warp Disruptor II<br>
| |
| |low=
| |
| Damage Control II<br>
| |
| Reactor Control Unit I<br>
| |
| Armor Explosive Hardener II<br>
| |
| Energized Adaptive Nano Membrane II<br>
| |
| Energized Adaptive Nano Membrane II<br>
| |
| 1600mm Reinforced Rolled Tungsten Plates I<br>
| |
| 1600mm Reinforced Rolled Tungsten Plates I<br>
| |
| | |
| |charges=
| |
| Cap Booster 800
| |
| |drones=
| |
| Warrior II x5<br>
| |
| Hammerhead II x5<br>
| |
| Ogre II x5<br>
| |
| Bouncer II x5<br>
| |
| Vespa EC-600 x5
| |
| |rigs=
| |
| Large Trimark Armor Pump I<br>
| |
| Large Trimark Armor Pump I<br>
| |
| Large Trimark Armor Pump I
| |
| | |
| |recommended1=
| |
| Acceleration Control IV<br>
| |
| Afterburner III<br>
| |
| Armor Rigging III<br>
| |
| Combat Drone Operation IV<br>
| |
| Drone Durability III<br>
| |
| Drone Interfacing V<br>
| |
| Drone Navigation V<br>
| |
| Drone Sharpshooting IV<br>
| |
| Drones V<br>
| |
| Electronic Warfare IV<br>
| |
| Electronic Warfare Drone Interfacing III<br>
| |
| Electronics IV<br>
| |
| EM Armor Compensation IV<br>
| |
| Energy Emission Systems IV<br>
| |
| Energy Grid Upgrades II<br>
| |
| Energy Management IV<br>
| |
| |recommended2=
| |
| Energy Systems Operation IV<br>
| |
| Engineering V<br>
| |
| Evasive Maneuvering IV<br>
| |
| Explosive Armor Compensation IV<br>
| |
| Gallente Battleship IV<br>
| |
| Gallente Cruiser IV<br>
| |
| Gallente Drone Specialization IV<br>
| |
| Gallente Frigate IV<br>
| |
| Heavy Drone Operation V<br>
| |
| High Speed Maneuvering IV<br>
| |
| Hull Upgrades V<br>
| |
| Jury Rigging III<br>
| |
| Kinetic Armor Compensation IV<br>
| |
| Long Range Targeting IV<br>
| |
| Mechanic V<br>
| |
| Minmatar Drone Specialization IV<br>
| |
| |recommended3=
| |
| Nanite Interfacing III<br>
| |
| Nanite Operation III<br>
| |
| Navigation IV<br>
| |
| Propulsion Jamming IV<br>
| |
| Science IV<br>
| |
| Scout Drone Operation V<br>
| |
| Sentry Drone Interfacing V<br>
| |
| Shield Management IV<br>
| |
| Signature Analysis IV<br>
| |
| Spaceship Command IV<br>
| |
| Targeting IV<br>
| |
| Thermic Armor Compensation IV<br>
| |
| Thermodynamics IV<br>
| |
| Warp Drive Operation III<br>
| |
| | |
| |notes=
| |
| }} | |
|
| |
|
| ==Tactics== | | ==Tactics== |


