More actions
Tycho kesha (talk | contribs) →Fitting: Imported from the Caldari Basic Ship Guide |
|||
| Line 86: | Line 86: | ||
==Fitting== | ==Fitting== | ||
'' | {{Fittings | ||
|name=Raven, PvE Basic Raven | |||
|high= | |||
'Arbalest' Cruise Launcher I<br> | |||
'Arbalest' Cruise Launcher I<br> | |||
'Arbalest' Cruise Launcher I<br> | |||
'Arbalest' Cruise Launcher I<br> | |||
'Arbalest' Cruise Launcher I<br> | |||
'Arbalest' Cruise Launcher I<br> | |||
[empty high slot]<br> | |||
[empty high slot] | |||
|mid= | |||
X-Large Shield Booster II<br> | |||
Shield Boost Amplifier II<br> | |||
Shield Boost Amplifier II<br> | |||
Ballistic Deflection Field II<br> | |||
Ballistic Deflection Field II<br> | |||
Heat Dissipation Field II | |||
|low= | |||
Capacitor Flux Coil II<br> | |||
Capacitor Flux Coil II<br> | |||
Ballistic Control System II<br> | |||
Ballistic Control System II<br> | |||
Ballistic Control System II | |||
|charges=Wrath Cruise Missile<br> | |||
|drones=Hobgoblin II x5<br> | |||
Hammerhead II x5 | |||
|rigs=Large Capacitor Control Circuit I<br> | |||
Large Capacitor Control Circuit I<br> | |||
Large Capacitor Control Circuit I | |||
|recommended1= | |||
Combat Drone Operation IV<br> | |||
Drones V<br> | |||
Drone Durability III<br> | |||
Drone Interfacing IV<br> | |||
Drone Navigation IV<br> | |||
Gallente Drone Specialization II<br> | |||
Scout Drone Operation V<br> | |||
Electronics V<br> | |||
Long Range Targeting III<br> | |||
Signature Analysis III<br> | |||
Targeting IV<br> | |||
Engineering IV<br> | |||
Energy Grid Upgrades IV | |||
|recommended2= | |||
Energy Management IV<br> | |||
Energy Systems Operation IV<br> | |||
Shield Compensation III<br> | |||
Shield Management V<br> | |||
Shield Operation V<br> | |||
Shield Upgrades IV<br> | |||
Tactical Shield Manipulation IV<br> | |||
Weapon Upgrades IV<br> | |||
Jury Rigging I<br> | |||
Cruise Missiles IV<br> | |||
Guided Missile Precision III<br> | |||
Heavy Missiles III<br> | |||
Missile Bombardment III | |||
|recommended3= | |||
Missile Launcher Operation V<br> | |||
Missile Projection III<br> | |||
Rapid Launch IV<br> | |||
Standard Missiles III<br> | |||
Target Navigation Prediction IV<br> | |||
Warhead Upgrades III<br> | |||
Evasive Maneuvering III<br> | |||
Navigation IV<br> | |||
Caldari Frigate IV<br> | |||
Caldari Cruiser IV<br> | |||
Caldari Battleship IV<br> | |||
Spaceship Command IV | |||
|notes= | |||
* This fitting has missiles and hardeners fitted for Guristas Pirates rats. For Angel Cartel, try fitting an Explosion Dampening Field II, an Invulnerability Field II, and a Cap Recharger II in the last three mids. | |||
* Consider making it your goal to purchase more cap-efficent tank modules so that you can start using the Large Warhead Rigor Catalyst I in some of the rig slots. This will give you much better damage against smaller ships, to help out your drones. | |||
* This fit is taken from [http://eve.battleclinic.com/loadout/27770-Perfect-Starter-Lv4-Mission-raven.html Battleclinic], which has a long discussion of the pros and cons of various modules. | |||
}} | |||
{{Fittings | |||
|name=Raven, RRBS Gang | |||
|high= | |||
'Arbalest' Cruise Launcher I<br> | |||
'Arbalest' Cruise Launcher I<br> | |||
'Arbalest' Cruise Launcher I<br> | |||
'Arbalest' Cruise Launcher I<br> | |||
'Arbalest' Cruise Launcher I<br> | |||
'Arbalest' Cruise Launcher I<br> | |||
Large Energy Transfer Array II<br> | |||
Large Shield Transporter II | |||
|mid= | |||
Quad LiF Fueled I Booster Rockets<br> | |||
Sensor Booster II<br> | |||
Invulnerability Field II<br> | |||
Invulnerability Field II<br> | |||
Invulnerability Field II<br> | |||
Large Shield Extender II | |||
|low= | |||
Ballistic Control System II<br> | |||
Ballistic Control System II<br> | |||
Ballistic Control System II<br> | |||
Power Diagnostic System II<br> | |||
Damage Control II | |||
|charges=Wrath Cruise Missile<br> | |||
|drones=Warrior II x5<br> | |||
Valkyrie II x5 | |||
|rigs=Large Core Defence Field Extender I<br> | |||
Large Core Defence Field Extender I<br> | |||
Large Anti-EM Screen Reinforcer I | |||
|recommended1= | |||
|recommended2= | |||
|recommended3= | |||
|notes= | |||
* This fit uses almost all of your cpu. If you are finding that you do not have enough, consider a Co-Processor instead of a Power Diagnostic System. | |||
* The propulsion mod is used to close range quickly to get within energy transfer and remote repair range after jumping through gates. | |||
}} | |||
==Tactics== | ==Tactics== | ||
Revision as of 20:38, 15 November 2011

High Amount of High Slots
HIGHLIGHTS
RELATED UNI-WIKI REFERENCES
|
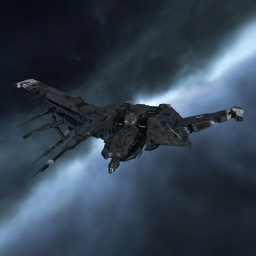
The Raven is the powerhouse of the Caldari Navy. With its myriad launcher slots and powerful shields, few ships can rival it in strength or majesty. SHIP BONUSES
Caldari Battleship Skill Bonus: 5% bonus to Cruise and Siege Launcher Rate Of Fire and 10% bonus to Cruise Missile and Torpedo Velocity per level.
Ship Attributes
|
Summary
The Raven is a dedicated missile boat, that can be fitted with either cruise missile launchers or siege launchers and has equal bonuses to both. It is a very popular PvE level 4 mission runner, since it can use any missile ammunition equally well, allowing free choice of damage type. Their low speed and less-than-stellar tank make ravens a rarer sight in PvP, though torpedo firing ravens can make a serious dent in enemy battleships... if they can get in range. When fit with cruise missiles ravens have excellent range without needing to sacrifice slots on tracking enhancers or computers. In PvE this is a nice advantage, but in PvP the long travel time of the missile gives the target ample time to align and warp away unless it is held by a tackler, making ravens unpopular pvp snipers.
Skills
Further information about additional or recommended skills to pilot Raven for a specific or it's common role(s) can be written here.
Fitting
Tactics
No sub-article about Raven roles or piloting tactics. You can write them here.
Notes
You can write additional notes for Raven here.


