More actions
m →Summary |
Tycho kesha (talk | contribs) →Fitting: Imported from Gallente Basic Ship Guide |
||
| Line 89: | Line 89: | ||
==Fitting== | ==Fitting== | ||
{{Fittings | |||
|name=Catalyst, Mission Basic | |||
|high= | |||
125mm Railgun I<br> | |||
125mm Railgun I<br> | |||
125mm Railgun I<br> | |||
125mm Railgun I<br> | |||
125mm Railgun I<br> | |||
125mm Railgun I<br> | |||
125mm Railgun I<br> | |||
125mm Railgun I | |||
|mid= | |||
1MN Afterburner I<br> | |||
Cap Recharger I | |||
|low= | |||
Damage Control I<br> | |||
Small Armor Repairer I<br> | |||
Micro Auxiliary Power Core I | |||
|charges= | |||
Antimatter Charge S | |||
|drones= | |||
Hobgoblin I x1 | |||
|rigs= | |||
[empty rig slot]<br> | |||
[empty rig slot]<br> | |||
[empty rig slot] | |||
|recommended1= | |||
Acceleration Control I<br> | |||
Afterburner II<br> | |||
Controlled Bursts II<br> | |||
Destroyers I<br> | |||
Drones I<br> | |||
Energy Grid Upgrades II<br> | |||
Energy Management II | |||
|recommended2= | |||
Energy Systems Operation II<br> | |||
Evasive Maneuvering I<br> | |||
Gallente Frigate III<br> | |||
Gunnery III<br> | |||
Hull Upgrades II<br> | |||
Mechanic II<br> | |||
Motion Prediction II | |||
|recommended3= | |||
Rapid Firing II<br> | |||
Repair Systems II<br> | |||
Scout Drone Operation I<br> | |||
Sharpshooter II<br> | |||
Small Hybrid Turret III<br> | |||
Targeting II | |||
|notes= | |||
* Switch the Micro Auxiliary Power Core I to Adaptive Nano Plating I (omni tanking) or Reactive Plating I (to fill the explosive hole in armor tanking, especially when facing Angel Cartel rats) if you have sufficient powergrid. | |||
* Fit three Small Capacitor Control Circuit I rigs if you can afford it (requires Jury Rigging I and Mechanic III). | |||
}} | |||
{{Fittings | |||
|name=Catalyst, Salvaging Boat | |||
|high= | |||
Small Tractor Beam I<br> | |||
Small Tractor Beam I<br> | |||
Small Tractor Beam I<br> | |||
Small Tractor Beam I<br> | |||
Salvager I<br> | |||
Salvager I<br> | |||
Salvager I<br> | |||
Salvager I | |||
|mid= | |||
1MN MicroWarpdrive I<br> | |||
Cap Recharger I | |||
|low= | |||
Capacitor Power Relay I<br> | |||
Capacitor Power Relay I<br> | |||
Co-Processor I | |||
|charges= | |||
|drones= | |||
|rigs= | |||
Small Salvage Tackle I<br> | |||
Small Salvage Tackle I<br> | |||
Small Salvage Tackle I | |||
|recommended1= | |||
Acceleration Control II<br> | |||
Afterburner III<br> | |||
Armor Rigging II<br> | |||
Destroyers I<br> | |||
Electronics IV<br> | |||
Electronics Upgrades I | |||
|recommended2= | |||
Energy Grid Upgrades II<br> | |||
Energy Management II<br> | |||
Energy Systems Operation II<br> | |||
Evasive Maneuvering II<br> | |||
Gallente Frigate III<br> | |||
High Speed Maneuvering III | |||
|recommended3= | |||
Jury Rigging III<br> | |||
Mechanic III<br> | |||
Navigation III<br> | |||
Salvaging III | |||
|notes= | |||
* The low slots on a salvaging boat can vary. The co-processor is only needed if you lack cpu, Electronics IV will give enough cpu to fit a third Capacitor Power Relay I. The capacitor power relays help running the modules for longer periods of time, especially if cap skills are low. Cargo expanders can be of use in missions with many wrecks to loot. Even with cargo expanders, a destroyer will often run out of cargo space in level 4 missions. | |||
* Rigs are optional, they are very expensive for most newbies. | |||
* If salvaging sleeper sites in wormhole space, it is recommended to replace one tractor and one salvager by a prototype cloaking device and a core probe launcher. | |||
}} | |||
==Tactics== | ==Tactics== | ||
Revision as of 20:19, 18 November 2011


High Amount of High Slots
HIGHLIGHTS
RELATED UNI-WIKI REFERENCES
|
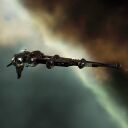
Ideally suited for both skirmish warfare and fleet support, the Catalyst is touted as one of the best anti-frigate platforms out there. Faced with its top-of-the-line tracking equipment, not many can argue. SHIP BONUSES
Destroyer Skill Bonus:
Ship Attributes
|
Summary
The Catalyst is the gallente destroyer. Its bonuses favor blasters, though it can also be rail fit. It has 2 mids, allowing it to fit a tackle module, and 3 low slots for an armor tank. Unfortunately the catalyst is still a destroyer, so it has a large signature for its tank, making it vulnerable to cruiser weapons, and it's slower than a frigate meaning it will have difficulty staying in blaster range.
A railgun fit catalyst is however a very fast l1 mission runner, but has trouble tanking level 2s.
Skills
Further information about additional or recommended skills to pilot Catalyst for a specific or it's common role(s) can be written here.
Fitting
Tactics
No sub-article about Catalyst roles or piloting tactics. You can write them here.
Notes
You can write additional notes for Catalyst here.


