|high=Small Tractor Beam I <br> Small Tractor Beam I <br> Small Tractor Beam I <br> Small Tractor Beam I <br> Salvager I <br> Salvager I <br> Salvager I <br> Salvager I
|mid=1MN MicroWarpdrive I <br> Cap Recharger II <br> Cap Recharger II <br> Cap Recharger II
|low=Expanded Cargohold II
|charges=
|drones=
|rigs=Small Salvage Tackle I <br> Small Salvage Tackle I <br> Small Salvage Tackle I
|recommended1= Afterburner III <br> Destroyers I <br> High Speed Maneuvering I <br> Navigation III <br>
|recommended2= Armor Rigging I <br> Energy Grid Upgrades III <br> Jury Rigging III <br> Salvaging I
|recommended3= Caldari Frigate III <br> Hull Upgrades II <br> Mechanic III <br> Science III
|notes=
*With one Expanded Cargohold it will hold enough to clear up virtually all L1 and L2 missions in a single trip. For bigger missions you might have to make multiple trips. Alternatively, you can place all the loot and salvage into a jetcan and come back to pick it up in an industrial.
*With the Cap Rechargers you shouldn't have problem with cap even under intense use. Even if it runs out of cap, it should regenerate very quickly.
*Remember that you cannot use MicroWarpdrive in deadspace but there is a trick to it. As you progress through the mission, make bookmarks on one wreck in each room. When you return to your agent and report in, you can use the bookmarks to return to the wrecks with deadspace gone.
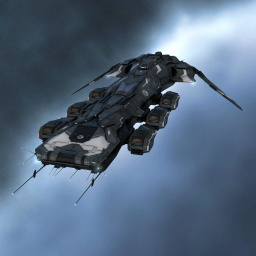
The Cormorant is the only State-produced space vessel whose design has come from a third party. Rumors abound, of course, but the designer's identity has remained a tightly-kept secret in the State's inner circle.
SHIP BONUSES
Destroyer Skill Bonus: 10% bonus to Small Hybrid Turret tracking speed per level 10% bonus to Small Hybrid Turret optimal range per level Role Bonuses: 50% bonus to optimal range for small hybrid turrets
Required Skills
Caldari Frigate III8h 53m
Spaceship Command I8m
Destroyers I16m
Spaceship Command III4h 26m
Training Time what's this?
0d 13h 45m
Estimated training time only for the listed skills based on zero implants and without neural remaps.
Base Time to Warp is essentially the time needed for this ship to align and accelerate until it reaches 75% of its top speed and goes to warp. The time displayed here is the base calculated time with no account for any warp related skills, modules or any other effects.
Drones
Drone Capacity
0 m³
Drone Bandwidth
0 Mbit/sec
Targeting
Max Tgt. Range
36 km
Max Locked Targets
7
Gravimetric Sensor
12 points
Sig. Radius
68 m
Scan Res.
475 mm
Structure
Structure Hitpoints
677 HP
Mass
1,892,000 kg
Volume
52,000 m³
Cargo Capacity
450 m³
Armor
Armor Hitpoints
688 HP
Armor Resistances
EM
50
THR
45
KIN
25
EXP
10
Shields
Shield Capacity
860 HP
Shield Resistances
EM
0
THR
20
KIN
40
EXP
50
Summary
The Cormorant is the caldari t1 destroyer. Its bonuses favor railguns, but it can be blaster fit if you like. The cormorant has many mid slots, which allows tackle gear and/or a shield tank. Of note is that the Cormorant's hull bonus to optimal range and the destroyer role bonus to optimal range gives it a spectacular range increase for railguns, such that it can be used as a poor man's anti-frigate sniper. Besides this niche role though the cormorant has little use in PvP. The Cormorant is however a very capable level 1 mission runner, but lacks the tank for most level 2s.
Skills
Further information about additional or recommended skills to pilot Cormorant for a specific or it's common role(s) can be written here.