More actions
Axel defour (talk | contribs) m →Fitting: edited to reflect extra slot |
Axel defour (talk | contribs) →Fitting: Added a solo bait fit. |
||
| Line 195: | Line 195: | ||
*The rigs are selected for low cost, but can be missed if desired. If you cannot target out to your tracking disruptors' optimal then use an Ionic Field Projector instead of the second Dispersion Projector. | *The rigs are selected for low cost, but can be missed if desired. If you cannot target out to your tracking disruptors' optimal then use an Ionic Field Projector instead of the second Dispersion Projector. | ||
}} {{Fittings | }} {{Fittings | ||
|name=Arbitrator, | |name=Arbitrator, Brawling Electronic Warfare T2 | ||
|low= | |low= | ||
Damage Control II<br> | Damage Control II<br> | ||
| Line 230: | Line 230: | ||
*The neuts on this version are purely defensive if some small ship decides to tackle the Arbitrator and orbits close. | *The neuts on this version are purely defensive if some small ship decides to tackle the Arbitrator and orbits close. | ||
*The MWD can be changed to an AB for speed tanking, depending on how the pilot wants to fly the ship. | *The MWD can be changed to an AB for speed tanking, depending on how the pilot wants to fly the ship. | ||
* | |||
}} | }} | ||
{{Fittings | {{Fittings | ||
|name=Arbitrator, Mining | |name=Arbitrator, Mining Bait | ||
|low= | |low= | ||
Damage Control II<br> | |||
1600mm Reinforced Rolled Tungsten Plates I<br> | |||
Energized Adaptive Nano Membrane II<br> | |||
Drone Damage Amplifier II<br> | |||
Drone Damage Amplifier II | |||
|mid= | |mid= | ||
Experimental 10MN Microwarpdrive I<br> | |||
X5 Prototype Engine Enervator I<br> | |||
X5 Prototype Engine Enervator I<br> | |||
Faint Warp Disruptor I | |||
|high= | |high= | ||
Small Unstable Power Fluctuator I<br> | |||
Small Unstable Power Fluctuator I<br> | |||
Small Unstable Power Fluctuator I<br> | |||
Small Unstable Power Fluctuator I | |||
|charges= | |charges= | ||
|drones= | |drones= | ||
Mining Drone I x5<br> | Mining Drone I x5<br> | ||
Hobgoblin | Hobgoblin II x10 | ||
Hammerhead II x5 | |||
Warrior II x5 | |||
|rigs= | |rigs= | ||
Medium Trimark Armor Pump I<br> | |||
Medium Trimark Armor Pump I<br> | |||
Medium Anti-Explosive Pump I<br> | |||
|recommended1= | |recommended1= | ||
| Line 255: | Line 266: | ||
|notes= | |notes= | ||
*Sit in a belt mining with your mining drones and wait for someone to assume you're foolish. When he lands near you, panic and align out, but let him grab point and burn within web range. If he gets close enough, double web and hit him with the Hobgoblins for maximum damage. If he stays in long point range, use the Warriors. | |||
*Ideal prey are Assault Frigates, Destroyers, and other small prey. Use d-scan and warp off if cruisers or better get too close. | |||
*Don't wait for your mining drones to recall. Abandon them and immediately launch your damage drones. You can always reconnect to them after the fight is won. | |||
}} | }} | ||
Revision as of 20:05, 1 January 2013

RELATED UNI-WIKI REFERENCES
|
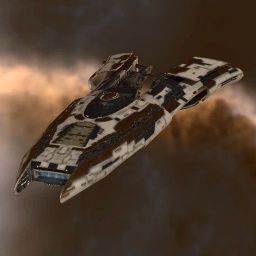
The Arbitrator is unusual for Amarr ships in that it's primarily a drone carrier. While it is not the best carrier around, it has superior armor that gives it greater durability than most ships in its class. SHIP BONUSES
Amarr Cruiser Skill Bonus:
Ship Attributes
|
Summary
The Arbitrator is a ship of many roles: it can deal damage as a drone boat, it is an EWAR platform and it is the Amarr mining cruiser, all rolled in to one. If you buy one Amarr cruiser, make it the Arbitrator. It has the largest drone bay of any T1 cruiser, beating even the Gallente Vexor, though it has less drone bandwidth than the Vexor. It can still field a full flight of medium drones at a time however, and has the bay to carry 3 flights of medium drones or 6 flights of light drones (or a mix), giving it unparalleled flexibility in its class. As well as its drones the Arbitrator also has bonuses to the Amarr racial EWAR, Tracking Disruption.
The Arbitrator has a balanced slot layout of mids and lows, but is normally armor tanked to allow the mids to be used for tracking disruptors or tackle. The Arbitrator has no bonuses to any weapon type, so can use any turret it likes, but given the split turret and launcher slots and lack of bonuses many pilots forego weapons entirely in favor of Drone Link Augmentors and/or nosferatu or neutraliser arrays.
Skills
Further information about additional or recommended skills to pilot Arbitrator for a specific or it's common role(s) can be written here.
Fitting
Template:Fittings Template:Fittings Template:Fittings Template:Fittings Template:Fittings
Use AB to set up tranversal against snipers or battleships. A mix of range and tracking scripts will be up to the pilot to decide how to use. For example, battleships that are tracking disrupted, won't be able to easily hit the ECM drones, and can be taken out of the battle, if it goes on long enough. Thus perhaps saving a fleet member from being dpsed down by the BS.
Snipers that warp into your optimals or lock range, you can get rid of their optimal range, so they either miss, do less damage, and are thus forced to bounce out to further ranges. Tank is 49.5k with perfect skills, 46.2 with compensation at 2. 4 of these and you basically have a battleship that travels faster and is more flexible, with 131 dps from Valkyrie IIs per arbitrator. A 524 (minimum) dps battleship that only costs around 100 million! Quad box away.
Tactics
Tracking disruptors damage the enemy's optimal range and fall off by the same percent. They also damage the enemy's tracking. Both can be scripted to increase the effect and to reduce the stacking penalties when using more than one.
Most of how to use it will be acquired in game with experience. As an example, 2 scripted range TDs used against an artillery thrasher with one tracking disruption, can reduce the range of titanium ammo from 30km to under 7km, with very poor chances of hitting a fast traversing frigate. It's sort of an "I win" button against certain ships. Many solo pilots also use it to reduce the incoming damage of larger, additional enemy ships so they can win against fearsome odds. The bonused version is significantly stronger than the unbonused one, but still very skill strength dependent.
Notes
This vessel qualifies for the University Ship Replacement, PYOS, BYOM, and Mining Loaner Fleet programs.


