More actions
→Tactics: edited for language and format |
m →Tactics |
||
| Line 104: | Line 104: | ||
* '''Keep an appropriate distance.''' If you are only fit with a warp disruptor, check its optimal range, and subtract 4 km from that number; this is the distance at which you’ll want to orbit your target. (This gives you 4 km of wiggle room.) If you stray too far below this distance, you will be within range of your opponent’s shorter-range scram, web and/or neuts. You can set your ship’s custom default orbit by right-clicking on the Orbit button in the Selected Item window; you should set your default 2 km less than the number you calculated above, because of overshoot at high speeds. | * '''Keep an appropriate distance.''' If you are only fit with a warp disruptor, check its optimal range, and subtract 4 km from that number; this is the distance at which you’ll want to orbit your target. (This gives you 4 km of wiggle room.) If you stray too far below this distance, you will be within range of your opponent’s shorter-range scram, web and/or neuts. You can set your ship’s custom default orbit by right-clicking on the Orbit button in the Selected Item window; you should set your default 2 km less than the number you calculated above, because of overshoot at high speeds. | ||
If you are fit with a scram, and you want to use it on your target, set your orbit to 500 meters and shut off your microwarpdrive (MWD) once you get within ~10 km of your target. This will allow your ship to quickly achieve a stable orbit at extremely close range to hopefully get under and stay under enemy guns. If you turn your MWD off too late you will 'yo-yo' on the target and potentially lose your scram. Leaving your MWD on drains capacitor unnecessarily, makes it much easier for other ships to shoot you (due to the signature bloom of an active MWD), and may force you into an elliptical orbit that pushes you outside of scram range. | :If you are fit with a scram, and you want to use it on your target, set your orbit to 500 meters and shut off your microwarpdrive (MWD) once you get within ~10 km of your target. This will allow your ship to quickly achieve a stable orbit at extremely close range to hopefully get under and stay under enemy guns. If you turn your MWD off too late you will 'yo-yo' on the target and potentially lose your scram. Leaving your MWD on drains capacitor unnecessarily, makes it much easier for other ships to shoot you (due to the signature bloom of an active MWD), and may force you into an elliptical orbit that pushes you outside of scram range. | ||
* '''Spiral in.''' Because the Slasher is poorly tanked, the Slasher pilot needs to avoid getting hit on approach. If the target is a turret ship, one way to avoid damage is to "spiral" towards the target, and to never fly directly at the target, in order to maximize transversal (and thus evade the tracking of the target's guns). The spiraling method does not help against opponents flying missile or drone ships, though, and Slasher pilots should just fly straight at these targets. | * '''Spiral in.''' Because the Slasher is poorly tanked, the Slasher pilot needs to avoid getting hit on approach. If the target is a turret ship, one way to avoid damage is to "spiral" towards the target, and to never fly directly at the target, in order to maximize transversal (and thus evade the tracking of the target's guns). The spiraling method does not help against opponents flying missile or drone ships, though, and Slasher pilots should just fly straight at these targets. | ||
Revision as of 16:04, 26 July 2017

RELATED UNI-WIKI REFERENCES
|
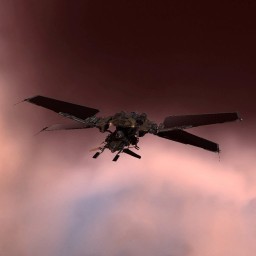
The Slasher is cheap, but versatile. It's been manufactured en masse, making it one of the most common vessels in Minmatar space. The Slasher is extremely fast, with decent armaments, and is popular amongst budding pirates and smugglers. SHIP BONUSES
Traits:
Ship Attributes
|

Summary
The Slasher is the Minmatar Attack Frigate. The Slasher's extraordinary speed, agility, and bonus to propulsion jamming modules (warp disruptors, warp scramblers and stasis webifiers) make it an excellent tackle frigate. The ship’s four mid slots allow it to be fit with more than one propulsion jammer, or a variety of other support modules, making the Slasher tricky to predict and counter. The Slasher also has bonuses to projectile weapons, though Slasher tacklers are sometimes too far from their targets to apply much damage with them. The Slasher is the most versatile of the four racial Attack Frigates, and can be flown in a number of different ways. But the job of a Slasher pilot is typically the same as that of any tackler: to pin down an enemy and stay alive long enough for fleetmates to arrive and deliver the punch.
The Slasher’s versatility makes it an excellent hull for new pilots learning different approaches to tackling and scouting. Flying the Slasher provides great practice for eventually flying fleet interceptors (such as the Stiletto), which are more commonly used as fleet scouts and first tacklers. Nevertheless, even though the Tech I Slasher isn't quite as effective as a Tech II Interceptor, it can still serve as an amazing long-point tackle ship. E-UNI Slasher pilots are strongly advised to read the UniWiki guide to tackling, and to attend a Tackling 101 practical.
The Slasher has relatively low base HP, which is evenly spread between hull, armor and shield. As a result, the Slasher is difficult to tank, and is the flimsiest of the four racial Attack Frigates after fitting. The ship makes up for its poor tank with a low signature radius and high speed, which makes the Slasher tough to hit. Like other tackle frigates, the tackle Slasher is typically equipped with a microwarpdrive and a warp disruptor (“point”) in two of its mid slots. But the other two mids can be fit with a variety of different modules—a shield extender, a warp scrambler (“scram”), a stasis webifier (“web”), a signal amplifier for fast lock time, or even a tracking or guidance disruptor to mitigate enemy damage. Different fits require different tactics, some of which are described in the Tactics section below. In the end, Slasher pilots are encouraged to try out different layouts, and experience first-hand how their choices affect the way the ship flies.
Some inherent limitations make the Slasher less effective as a damage dealer, PvE, or solo PvP ship. The Slasher receives bonuses to projectile damage and tracking, but the short range of small projectiles means that the ship must fly close to an enemy to apply damage. This puts the Slasher within range of an opponent’s scram, web, and neuts, which spell danger for the nimble Slasher. The Slasher can avoid this by kiting the enemy, if it is fit with longer-range small artillery, but the damage output of artillery is lower. Minmatar characters interested in a PvE frigate may be better off flying one of the two Minmatar Combat Frigates (the Breacher or Rifter). And Minmatar PvP pilots might wait to skill into the Republic Fleet Firetail, which is an exceptional PvP ship.
Skills
- From the ship description:
- Core Competency - Basic [Certificate]
- Frigate Projectile Turrets - Basic [Certificate]
- Propulsion Jammer Operator - Basic [Certificate]
- High Velocity Helmsman - Basic [Certificate]
Fitting
<wikifit shipid="585" doctrineid="35020" />
Tactics
Fleet Slasher pilots should read the UniWiki articles on Scouting and Tackling; these provide details on how to serve as the fleet vanguard, and how to approach and point a target once it is on grid. Some tips on flying the tackle Slasher:
- Choose your targets wisely. The Slasher is especially effective against large ships, because they have trouble tracking the Slasher with their larger weapons systems. Slasher pilots can make a bid on any ship that is battlecruiser-sized and larger, on most cruisers, and even some destroyers. Anti-tackle faction cruisers, Tech III destroyers, and enemy frigates, on the other hand, will still outrun the rest of your fleet if they are fit for speed, even if you stay with and point them. If you have fitted a scram or web in addition to your point, you can tackle these speedier targets. But, be prepared to take some damage--ships like these are typically fit to hit tackle frigates like yours.
- Keep an appropriate distance. If you are only fit with a warp disruptor, check its optimal range, and subtract 4 km from that number; this is the distance at which you’ll want to orbit your target. (This gives you 4 km of wiggle room.) If you stray too far below this distance, you will be within range of your opponent’s shorter-range scram, web and/or neuts. You can set your ship’s custom default orbit by right-clicking on the Orbit button in the Selected Item window; you should set your default 2 km less than the number you calculated above, because of overshoot at high speeds.
- If you are fit with a scram, and you want to use it on your target, set your orbit to 500 meters and shut off your microwarpdrive (MWD) once you get within ~10 km of your target. This will allow your ship to quickly achieve a stable orbit at extremely close range to hopefully get under and stay under enemy guns. If you turn your MWD off too late you will 'yo-yo' on the target and potentially lose your scram. Leaving your MWD on drains capacitor unnecessarily, makes it much easier for other ships to shoot you (due to the signature bloom of an active MWD), and may force you into an elliptical orbit that pushes you outside of scram range.
- Spiral in. Because the Slasher is poorly tanked, the Slasher pilot needs to avoid getting hit on approach. If the target is a turret ship, one way to avoid damage is to "spiral" towards the target, and to never fly directly at the target, in order to maximize transversal (and thus evade the tracking of the target's guns). The spiraling method does not help against opponents flying missile or drone ships, though, and Slasher pilots should just fly straight at these targets.
- Anticipate your opponent. Try and determine your opponent’s direction of flight, and cut them off. Your opponent may try to "slingshot" you by flying towards you, and making you overshoot the target. Be ready to change directions quickly.
- Call your point in comms. Let your fleetmates know when they should warp to you!
Slasher pilots can learn more about tackling by attending Tackling 101.
Notes
You can add notes here.
Patch History
| A long, long time ago... |
|---|
|
YC119.3 V.1.0 – Build: 1132976 – 14.03.17
YC119.2 v.1.0 – Build: 1121744 – 14.02.17
YC118.8 v.1.0 – Build: 1077233 – 13.09.16
March 2016 v.1.0 – Build: 1030955 – 08.03.16
December v1.0 – Build: 995003 – 08.12.15
Retribution v.1.0 – Build: 476047 – 04.12.12
Inferno v.1.2 – Build: 404131 – 08.08.12 The next step in the ongoing removal of ship Tiers (as described in this Dev Blog) affects the Attack Frigates: the Executioner, Condor, Atron and Slasher. Attack Frigates are designed as high speed damage dealing and tackling vessels.
|


