More actions
| Line 179: | Line 179: | ||
| showTOC=Y | | showTOC=Y | ||
| shipDNA=17918:2048;1:4405;2:22291;3:2281;2:1952;1:29009;1:4383;1:19814;1:24438;2:28999;1:16519;5:203;1:24427;1:26030;1:25912;1:25908;1:2446;2:2456;5:28209;2:23705;5:: | | shipDNA=17918:2048;1:4405;2:22291;3:2281;2:1952;1:29009;1:4383;1:19814;1:24438;2:28999;1:16519;5:203;1:24427;1:26030;1:25912;1:25908;1:2446;2:2456;5:28209;2:23705;5:: | ||
}} | }}{{ShipFitting | ||
{{ShipFitting | |||
| ship=Rattlesnake | | ship=Rattlesnake | ||
| shipTypeID=17918 | | shipTypeID=17918 | ||
| Line 257: | Line 255: | ||
| skills=Caldari Battleship IV</li><li>Gallente Battleship IV</li><li>Weapon Upgrades V</li><li>Advanced Weapon Upgrades IV</li><li>Drones V</li><li>Combat Drone Operation V</li><li>Drone Interfacing IV</li><li>Drone Sharpshooting IV</li><li>Sentry Drone Interfacing IV</li><li>Gallente Drone Specialization IV</li><li>Minmatar Drone Specialization IV</li><li>Caldari Drone Specialization IV</li><li>Shield Operation IV</li><li>Shield Management IV</li><li>Tactical Shield Manipulation IV </li><li>Shield Upgrades IV</li><li>EM Shield Compensation IV</li><li>Thermic Shield Compensation IV</li><li>Kinetic Shield Compensation IV</li><li>Explosive Shield Compensation IV</li><li>Hull Upgrades IV| | | skills=Caldari Battleship IV</li><li>Gallente Battleship IV</li><li>Weapon Upgrades V</li><li>Advanced Weapon Upgrades IV</li><li>Drones V</li><li>Combat Drone Operation V</li><li>Drone Interfacing IV</li><li>Drone Sharpshooting IV</li><li>Sentry Drone Interfacing IV</li><li>Gallente Drone Specialization IV</li><li>Minmatar Drone Specialization IV</li><li>Caldari Drone Specialization IV</li><li>Shield Operation IV</li><li>Shield Management IV</li><li>Tactical Shield Manipulation IV </li><li>Shield Upgrades IV</li><li>EM Shield Compensation IV</li><li>Thermic Shield Compensation IV</li><li>Kinetic Shield Compensation IV</li><li>Explosive Shield Compensation IV</li><li>Hull Upgrades IV| | ||
shipDNA=17918:2048;1:4405;3:15681;2:2281;2:1952;1:29009;1:4383;1:19814;1:24438;2:28999;1:16519;4:203;1:24427;2:25920;1:25912;1:25908;1:2446;2:2456;5:28209;2:23705;5:: | shipDNA=17918:2048;1:4405;3:15681;2:2281;2:1952;1:29009;1:4383;1:19814;1:24438;2:28999;1:16519;4:203;1:24427;2:25920;1:25912;1:25908;1:2446;2:2456;5:28209;2:23705;5:: | ||
}} | }}{{ShipFitting| | ||
{{ShipFitting| | |||
ship=Rattlesnake| | ship=Rattlesnake| | ||
shipTypeID=17918| | shipTypeID=17918| | ||
| Line 338: | Line 333: | ||
skills=| | skills=| | ||
notes=Massive passive shield tank, combined with strong dps at medium to short ranges (<30 km), but slow speed.</li><li>Free high slots can be used for drone link amplifiers to help with sniping, one energy vampire and destabilizer each for cap warfare, or with one remote shield transporter and one energy transfer array for use in gangs.</li><li>Use the AB to get into torpedo/heavy drone range or sentry drones to draw enemy ships while not worrying about incoming damage.</li><li>Upgrade to T2 launchers and drones when skills permit.}} | notes=Massive passive shield tank, combined with strong dps at medium to short ranges (<30 km), but slow speed.</li><li>Free high slots can be used for drone link amplifiers to help with sniping, one energy vampire and destabilizer each for cap warfare, or with one remote shield transporter and one energy transfer array for use in gangs.</li><li>Use the AB to get into torpedo/heavy drone range or sentry drones to draw enemy ships while not worrying about incoming damage.</li><li>Upgrade to T2 launchers and drones when skills permit.}} | ||
{{ShipFitting | |||
| ship=Rattlesnake | |||
| shipTypeID=17918 | |||
| fitName=C3 Solo Wormhole Runner | |||
| fitID=C3-Solo-Wormhole-Runner | |||
| low1name=Drone Damage Amplifier II | |||
| low1typeID=4405 | |||
| low2name=Drone Damage Amplifier II | |||
| low2typeID=4405 | |||
| low3name=Drone Damage Amplifier II | |||
| low3typeID=4405 | |||
| low4name=Ballistic Control System II | |||
| low4typeID=22291 | |||
| low5name=Capacitor Flux Coil II | |||
| low5typeID=1248 | |||
| low6name=Capacitor Flux Coil II | |||
| low6typeID=1248 | |||
| mid1name=Shield Boost Amplifier I | |||
| mid1typeID=11561 | |||
| mid2name=Cap Recharger II | |||
| mid2typeID=2032 | |||
| mid3name=X-Large C5-L Emergency Shield Overload I | |||
| mid3typeID=10888 | |||
| mid4name=Phased Weapon Navigation Array Generation Extron | |||
| mid4typeID=19814 | |||
| mid5name=Adaptive Invulnerability Field II | |||
| mid5typeID=2281 | |||
| mid6name=Cap Recharger II | |||
| mid6typeID=2032 | |||
| mid7name=Adaptive Invulnerability Field II | |||
| mid7typeID=2281 | |||
| high1name='Arbalest' Rapid Heavy Missile Launcher I, Caldari Navy Scourge Heavy Missile | |||
| high1typeID=33440 | |||
| charge1name=Caldari Navy Scourge Heavy Missile x5000 | |||
| charge1typeID=27441 | |||
| high2name='Arbalest' Rapid Heavy Missile Launcher I, Caldari Navy Scourge Heavy Missile | |||
| high2typeID=33440 | |||
| high3name=Drone Link Augmentor II | |||
| high3typeID=24427 | |||
| high4name='Arbalest' Rapid Heavy Missile Launcher I, Caldari Navy Scourge Heavy Missile | |||
| high4typeID=33440 | |||
| high5name='Arbalest' Rapid Heavy Missile Launcher I, Caldari Navy Scourge Heavy Missile | |||
| high5typeID=33440 | |||
| high6name='Arbalest' Rapid Heavy Missile Launcher I, Caldari Navy Scourge Heavy Missile | |||
| high6typeID=33440 | |||
| rig1name=Large Capacitor Control Circuit I | |||
| rig1typeID=25948 | |||
| rig2name=Large Capacitor Control Circuit I | |||
| rig2typeID=25948 | |||
| rig3name=Large Capacitor Control Circuit I | |||
| rig3typeID=25948 | |||
| drone1name=Berserker II x2 | |||
| drone1typeID=2478 | |||
| drone2name=Federation Navy Garde x2 | |||
| drone2typeID=31886 | |||
| drone3name=Caldari Navy Warden x2 | |||
| drone3typeID=31878 | |||
| drone4name=Hornet EC-300 | |||
| drone4typeID=23707 | |||
| charge2name=open | |||
| charge3name=open | |||
| charge4name=open | |||
| charge5name=open | |||
| drone5name=open | |||
| skills= | |||
| showSKILLS=N | |||
| notes=This fit is designed to solo run C3 wormhole sites. While being relatively inexpensive. It can pump out nearly 900 DPS with max skills and can tank up to 900 DPS with modules on overheat for short periods.</li><li>Blue pill is a handy addition to your cargo for emergency situations. A set of crystals, though expensive, can drastically improve your tank.</li><li>It is recommended that you carry a Mobile Depot at all times with warp core stabilizers in your cargohold should you be ganked while running sites.</li><li>While traveling, it is recommended to fit an improved cloak in place of the drone link module, a 500MN MWD in place of the target painter, and 3x warp core stabilizers + 3x inertial stabilizers in the low slots. The MWD/instant warp trick can be performed when fit this way. | |||
| showNOTES=N | |||
| difficulty=1 | |||
| warsop=A | |||
| warsopReason= | |||
| version=FROSTLINE 1.0 | |||
| showTOC=Y | |||
| shipDNA=17918:4405;3:22291;1:1248;2:11561;1:2032;2:10888;1:19814;1:2281;2:33440;5:27441;5000:24427;1:25948;3:2478;2:31886;2:31878;2:23707;1:: | |||
| fleetup= | |||
}} | |||
==Tactics== | ==Tactics== | ||
Revision as of 03:37, 26 February 2016

High Amount of Medium Slots
HIGHLIGHTS
RELATED UNI-WIKI REFERENCES
|
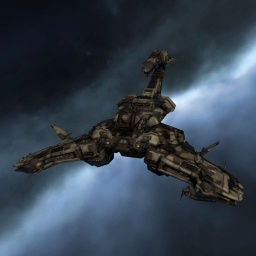
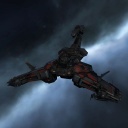
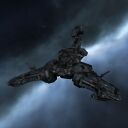
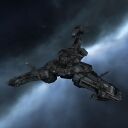
In the time-honored tradition of pirates everywhere, Korako ‘Rabbit' Kosakami shamelessly stole the idea of the Scorpion-class battleship and put his own spin on it. The result: the fearsome Rattlesnake, flagship of any large Gurista attack force. There are, of course, also those who claim things were the other way around; that the notorious silence surrounding the Scorpion's own origins is, in fact, an indication of its having been designed by Kosakami all along. SHIP BONUSES
Gallente Battleship bonuses (per skill level):
Ship Attributes
|
Summary
The Rattlesnake is a drone boat with excellent survivability due to its shield resist bonus. While it only has drone bandwidth for deployment of two sentry or heavy drones, the role bonus makes this equivalent to 7.5, which matches the Dominix at maximum skills. The drone bay is sufficient to carry several additional flights of drones of any size. The Rattlesnake does not have the Dominix's drone tracking and range bonuses, but the 7.5 effective missile launchers combined with the drone damage leads to a very effective ship. The Rattlesnake has the best tank in its class by quite a margin, which makes it a popular level 4 mission runner and also a capable level 5 mission runner with maximum skills.
Skills
- Caldari Battleship to at least IV to take advantage of the Shield Resistance Buff that comes with every extra level in the skill, and Gallente Battleship to at least IV to take advantage of the missile damage buff that comes with every extra level in the skill.
- Along with the requisite Engineering and Electronics skills required for adequately fitting most ships. Weapon upgrades and Advanced Weapon Upgrades should be trained to V and IV respectively to help alleviate fitting problems.
- Drones V, Combat Drone Operation V, Drone Interfacing IV, Drone Sharpshooting IV, Heavy Drone Operation V and Gallente Drone Specialization IV/Minmatar Drone Specialization IV are all are important to field T2 Heavy and Sentry Drones in order to get as much DPS out of the 50mb drone bandwidth as possible.
- Due to the Rattlesnake's inherent bonus to shield resistances, Shield Operation, Shield Management, and Tactical Shield Manipulation should be trained to at least IV to improve shield capacity, recharge rate and impenetrability.
- Shield Upgrades should be trained to IV to allow the use of T2 Shield Hardeners, Resistance Amplifiers, Shield Power Relays, Shield Extenders and Shield Rechargers.
- Finally, Hull Upgrades should be trained to level IV to allow use of the T2 Damage Control module.
Fitting
L4 PvE, Tech II, LMJD, Missile Emphasis
'Arbalest' Cruise Launcher I, Scourge Cruise Missile
'Arbalest' Cruise Launcher I, Scourge Cruise Missile
'Arbalest' Cruise Launcher I, Scourge Cruise Missile
'Arbalest' Cruise Launcher I, Scourge Cruise Missile
'Arbalest' Cruise Launcher I, Scourge Cruise Missile
Drone Link Augmentor II
Adaptive Invulnerability Field II
Adaptive Invulnerability Field II
Sensor Booster II, Targeting Range Script
Large Micro Jump Drive
Phased Weapon Navigation Array Generation Extron
Omnidirectional Tracking Link II, Optimal Range Script
Omnidirectional Tracking Link II, Optimal Range Script
Damage Control II
Drone Damage Amplifier II
Drone Damage Amplifier II
Ballistic Control System II
Ballistic Control System II
Ballistic Control System II
Large Warhead Calefaction Catalyst I
Large Drone Scope Chip I
Large Drone Control Range Augmentor I
Ogre II x2
Hobgoblin II x5
Warden II x2
Vespa EC-600 x5
Targeting Range Script x1
Optimal Range Script x1
Scourge Cruise Missile x1


- From http://nevillesmit.com/blog/2014/6/8/revisiting-the-rattlesnake-lmjd-pve
- Use the LMJD to move 100 km away from enemies. Deploy Warden sentries and pop enemy ships up to 120 km away. Use Bouncers and Gardes at medium and shorter ranges, respectively.
- Use missiles to draw aggro from more distant groups. Change missile type based on optimum damage type desired.
L4 PvE, Tech II, LMJD, Drone Emphasis
'Arbalest' Cruise Launcher I, Scourge Cruise Missile
'Arbalest' Cruise Launcher I, Scourge Cruise Missile
'Arbalest' Cruise Launcher I, Scourge Cruise Missile
'Arbalest' Cruise Launcher I, Scourge Cruise Missile
Drone Link Augmentor II
Drone Link Augmentor II
Adaptive Invulnerability Field II
Adaptive Invulnerability Field II
Sensor Booster II, Targeting Range Script
Large Micro Jump Drive
Phased Weapon Navigation Array Generation Extron
Omnidirectional Tracking Link II, Optimal Range Script
Omnidirectional Tracking Link II, Optimal Range Script
Damage Control II
Drone Damage Amplifier II
Drone Damage Amplifier II
Drone Damage Amplifier II
Caldari Navy Ballistic Control System
Caldari Navy Ballistic Control System
Large Sentry Damage Augmentor I
Large Drone Scope Chip I
Large Drone Control Range Augmentor I
Ogre II x2
Hobgoblin II x5
Warden II x2
Vespa EC-600 x5
Targeting Range Script x1
Optimal Range Script x1
Scourge Cruise Missile x1


- Caldari Battleship IV
- Gallente Battleship IV
- Weapon Upgrades V
- Advanced Weapon Upgrades IV
- Drones V
- Combat Drone Operation V
- Drone Interfacing IV
- Drone Sharpshooting IV
- Sentry Drone Interfacing IV
- Gallente Drone Specialization IV
- Minmatar Drone Specialization IV
- Caldari Drone Specialization IV
- Shield Operation IV
- Shield Management IV
- Tactical Shield Manipulation IV
- Shield Upgrades IV
- EM Shield Compensation IV
- Thermic Shield Compensation IV
- Kinetic Shield Compensation IV
- Explosive Shield Compensation IV
- Hull Upgrades IV
- From http://nevillesmit.com/blog/2014/6/8/revisiting-the-rattlesnake-lmjd-pve.
- Use the LMJD to move 100 km away from enemies. Deploy Warden sentries and pop enemy ships up to 120 km away. Use Bouncers and Gardes at medium and shorter ranges, respectively.
- Use missiles to draw aggro from more distant groups. Change missile type based on optimum damage type desired.
PvE brawler
Prototype 'Arbalest' Torpedo Launcher
Prototype 'Arbalest' Torpedo Launcher
Prototype 'Arbalest' Torpedo Launcher
Prototype 'Arbalest' Torpedo Launcher
Prototype 'Arbalest' Torpedo Launcher
Drone Link Augmentor II
Large Shield Extender II
Large Shield Extender II
Adaptive Invulnerability Field II
Adaptive Invulnerability Field II
EM Ward Field II
Shield Recharger II
100MN Afterburner I
Drone Damage Amplifier II
Drone Damage Amplifier II
Drone Damage Amplifier II
Damage Control II
Shield Power Relay II
Shield Power Relay II
Large Core Defense Field Extender I
Large Core Defense Field Purger I
Large Core Defense Field Purger I
Ogre I x5
Garde I x5
Hammerhead II x5
Hobgoblin II x5
Warrior II x5
Heavy Armor Maintenance Bot I x1
Medium Armor Maintenance Bot I x2
Light Armor Maintenance Bot I x1
Mjolnir Torpedo x1001


- Massive passive shield tank, combined with strong dps at medium to short ranges (<30 km), but slow speed.
- Free high slots can be used for drone link amplifiers to help with sniping, one energy vampire and destabilizer each for cap warfare, or with one remote shield transporter and one energy transfer array for use in gangs.
- Use the AB to get into torpedo/heavy drone range or sentry drones to draw enemy ships while not worrying about incoming damage.
- Upgrade to T2 launchers and drones when skills permit.
C3 Solo Wormhole Runner
'Arbalest' Rapid Heavy Missile Launcher I, Caldari Navy Scourge Heavy Missile
'Arbalest' Rapid Heavy Missile Launcher I, Caldari Navy Scourge Heavy Missile
Drone Link Augmentor II
'Arbalest' Rapid Heavy Missile Launcher I, Caldari Navy Scourge Heavy Missile
'Arbalest' Rapid Heavy Missile Launcher I, Caldari Navy Scourge Heavy Missile
'Arbalest' Rapid Heavy Missile Launcher I, Caldari Navy Scourge Heavy Missile
Shield Boost Amplifier I
Cap Recharger II
X-Large C5-L Emergency Shield Overload I
Phased Weapon Navigation Array Generation Extron
Adaptive Invulnerability Field II
Cap Recharger II
Adaptive Invulnerability Field II
Drone Damage Amplifier II
Drone Damage Amplifier II
Drone Damage Amplifier II
Ballistic Control System II
Capacitor Flux Coil II
Capacitor Flux Coil II
Large Capacitor Control Circuit I
Large Capacitor Control Circuit I
Large Capacitor Control Circuit I
Berserker II x2
Federation Navy Garde x2
Caldari Navy Warden x2
Hornet EC-300
Caldari Navy Scourge Heavy Missile x5000


- This fit is designed to solo run C3 wormhole sites. While being relatively inexpensive. It can pump out nearly 900 DPS with max skills and can tank up to 900 DPS with modules on overheat for short periods.
- Blue pill is a handy addition to your cargo for emergency situations. A set of crystals, though expensive, can drastically improve your tank.
- It is recommended that you carry a Mobile Depot at all times with warp core stabilizers in your cargohold should you be ganked while running sites.
- While traveling, it is recommended to fit an improved cloak in place of the drone link module, a 500MN MWD in place of the target painter, and 3x warp core stabilizers + 3x inertial stabilizers in the low slots. The MWD/instant warp trick can be performed when fit this way.
Tactics
No sub-article about Rattlesnake roles or piloting tactics. You can write them here.
Notes
You can write additional notes for Rattlesnake here.


