More actions
| Line 135: | Line 135: | ||
|high= | |high= | ||
Heavy | Heavy Electron Blaster II<br> | ||
Heavy | Heavy Electron Blaster II<br> | ||
Heavy | Heavy Electron Blaster II<br> | ||
Heavy | Heavy Electron Blaster II | ||
|mid= | |mid= | ||
Experimental 10MN | Experimental 10MN Microwarpdrive I<br> | ||
Large Shield | Large F-S9 Regolith Shield Induction<br> | ||
Fleeting Propulsion Inhibitor I<br> | |||
Faint Epsilon Warp Scrambler I | |||
|low= | |low= | ||
Damage Control II<br> | Damage Control II<br> | ||
Magnetic Field Stabilizer II<br> | Magnetic Field Stabilizer II<br> | ||
Magnetic Field Stabilizer II<br> | Magnetic Field Stabilizer II<br> | ||
Drone Damage Amplifier II<br> | |||
Drone Damage Amplifier II | |||
|rigs= | |rigs= | ||
Medium Anti-EM Screen Reinforcer I<br> | Medium Anti-EM Screen Reinforcer I<br> | ||
Medium Anti-Thermal Screen Reinforcer I<br> | Medium Anti-Thermal Screen Reinforcer I<br> | ||
Medium Anti-Kinetic Screen Reinforcer I | Medium Anti-Kinetic Screen Reinforcer I | ||
|drones= | |||
5x Hornet EC-300<br> | |||
5x Warrior II<br> | |||
2x Ogre II<br> | |||
2x Hammerhead II<br> | |||
1x Hobgoblin II | |||
|charges= | |||
Caldari Navy Antimatter Charge M<br> | |||
Null M | |||
|recommended1= | |recommended1= | ||
| Line 166: | Line 174: | ||
|notes= | |notes= | ||
* | * With Electronics V, Weapon Upgrades V, and a Electronics EE-601 implant, you can trade the Electron blasters for Ion | ||
* If enguaging smaller targets, or you can't used T2 heavies, swap mixed heavy/med/light drone flight for more med/light choices or Vespa EC-600s<br> | |||
* The resist rigs were chosen instead of extenders because the EHP is nearly the same with them, but they are much cheaper than field extenders. | * The resist rigs were chosen instead of extenders because the EHP is nearly the same with them, but they are much cheaper than field extenders. | ||
}}{{Fittings | }}{{Fittings | ||
Revision as of 20:26, 5 December 2012

RELATED UNI-WIKI REFERENCES
|
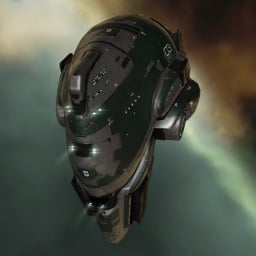
The Vexor is a strong combat ship that is also geared to operate in a variety of other roles. The Vexor is especially useful for surveying in potentially hostile sectors as it can stay on duty for a very long time before having to return to base. Furthermore, it is well capable of defending itself against even concentrated attacks. SHIP BONUSES
Gallente Cruiser Skill Bonus:
Ship Attributes
|
Summary
The Vexor is a dedicated drone boat. It has 75mb of drone bandwidth, allowing it to field a mixed flight of medium and heavy drones at a time, and has the drone bay to carry a few replacements or an additional flight of light drones. This gives the Vexor great flexibility for long roams, where it can carry a full flight of medium and light damage drones, as well as a flight of light repair or EWAR drones to deploy as the situation dictates. While the Vexor has a bonus to hybrid guns, this can be ignored if desired due to a large amount of the Vexor's DPS coming from drones anyway, and Vexors with autocannons, nosferatu and/or neutralisers are common. With 3 mids and 4 lows Vexors are most often armor tanked.
The Vexor is also a great ship to use for salvaging missions as they are completed. By using 2 Salvagers, a Small Tractor Beam, a Drone Link Augmentor and a single Hybrid Turret (to draw aggro) in the high slots a moderately drone-skilled capsuleer can securely complete level 2 missions while salvaging. Salvaging level 2 missions is debatably profitable however the salvage/mission fit Vexor can complete level 2s in respectable time when compared to a straight mission fit Vexor.
The Vexor is also the Gallente mining cruiser. It can easily carry flights of combat drones alongside its mining drones to give it very good firepower for a mining ship.
Among t1 cruisers the Vexor is a little more skill demanding than the Thorax. In particular you should not get a Vexor unless you have at least Drones 4 and should make getting Drones 5 a high priority.
Skills
Further information about additional or recommended skills to pilot Vexor for a specific or it's common role(s) can be written here.
Fitting
This guide provides general information and recommendations for T1 ships of a single player faction.
For more advanced and in-depth information on specific ships refer to EVE ships. This guide simply gathers the characteristics and overview of racial lineups in an easy to browse format for the very new player.
This guide aims to provide an overview of the different ships and their roles rather than specific fits.
The Gallente Federation is one of the four playable factions and has a unique and distinct line of ships.
 Gallente Federation Characteristics
| Tank Type: | |
| Main Weapon Systems: | |
| Electronic Warfare: |
General Traits
The following characteristics are shared across most or all Gallente ships:
- Hybrid Turrets: many Gallente ships have bonuses for hybrid turrets. Hybrid turrets use some capacitor energy to fire, like lasers, but they are less cap-hungry than lasers; they use physical ammunition, like projectile guns, but they have a shorter reload time (5 seconds). Different ammunition types offer trade-offs between range, damage, and capacitor load, but all hybrid turret ammunition deals a mixture of kinetic and thermal damage.
- Close-ranged blasters track very well and have very high potential DPS, but have short ranges even compared to the other short-ranged weapons (autocannon and pulse lasers). Some Gallente ships are particularly suited to brawling at minimum range with blasters, though they can adopt other tactics too.
- Long-ranged railguns lack the alpha damage of artillery but can achieve extraordinarily long ranges. Caldari hybrid turret ships are more associated with railguns, but some Gallente turret ships can work well with railguns too.
- Drones: many Gallente ships have bonuses for drones which make it viable to use drones as your main weapon—or even your only weapon; notable examples are the Algos, Vexor, Myrmidon, and Dominix. Almost all Gallente ships have substantial dronebays and drone bandwidth for their size and class.
- Armor tanks. Some Gallente ships have bonuses for armor repairers, which let them mount especially good active armor tanks. Some examples include the Incursus, Brutix, and Hyperion. Almost all Gallente ships armor tank well.
- Sensor Dampening. The Gallente racial EWAR specialty is sensor dampening, which cuts down enemy target locking range and/or slows down enemy targeting speed. Reducing target locking range works well against snipers and kiters; reducing targeting speed works well on large ships (which take a while to lock anything up anyway) and on logistics ships, which have to re-target their allies frequently in order to apply remote support.
- Tough hulls. Gallente ships have unusually tough hull ("structure") hit points, which means they tend to live a little longer when things turn bad and damage is getting through both the shields and the armor. (Some Gallente ships are frequently hull-tanked as that is just the best way to maximise EHP!)
If there is a broader hallmark of Gallente ships, it is perhaps damage: most Gallente combat ships can muster a lot of potential DPS at short range. The Vexor, for example, can achieve eye-watering potential DPS for a T1 cruiser if fitted with blasters, thanks to having damage bonuses to both turrets and drones. On the other hand, Gallente ships can be a little more fragile (the ships with tanking bonuses have bonuses to active armor tanks, not the resistance bonuses found on Amarr ships), with the lineup including some true "glass cannon" ships such as the Catalyst, and when fitted for DPS Gallente ships need to get to and maintain close ranges with their targets.
Notable uses
PvE
The long range and fully selectable damage of drones (set against the locking of hybrid turrets to kinetic and thermal damage) makes the line of Gallente drone boats very popular for PvE combat, as it means that pilots can pack drones to target the damage type that their NPC enemies are weakest to. A typical mission-runner progression might involve the Incursus or Tristan and then the Algos for L1s, the Vexor for L2s, the Myrmidon for L3s, and the Dominix for L4s.
Gallente drone ships are also popular as basic ratting ships in nullsec space, and for initial forays into low-tier Abyssal Deadspace PvE challenges; in both of these use cases, Gallente ships are eventually elbowed aside in more advanced uses by Guristas ships such as the Gila.
The Catalyst, with its many high slots, makes a good basic salvaging ship.
PvP
Short-range brawling with blasters is one of the core Gallente ship archetypes, and unsurprisingly many Gallente ships wind up being used for this in PvP: notable examples include the Catalyst, Thorax, Brutix, and Megathron. Railguns do work on these hulls, though. The Megathron can snipe well, and the Brutix can be turned into a surprisingly fast kiting ship.
The Gallente drone boats are some of the most versatile and unpredictable hulls available for PvP. The hulls without direct bonuses for weapons other than drones, such as the Myrmidon and Dominix, are often fitted with projectile turrets (for additional capacitor-free DPS), energy neutralizers (for capacitor warfare), or remote repair modules (a group of Dominixes can "tank" by repairing each other). Large dronebays mean that drone boat pilots can select damage types and can bring along extra tactical options such as ECM drones. Drones carry on fighting even if their mothership is affected by EWAR or has its capacitor neuted out.
Drone boats are less popular, however, for highly mobile small gangs (drones tend to get left behind in tactical warps) and in large fleets fighting at long range (normal drones take too long to travel to their target, while sentry drones get left behind in fleet movements). Drones also cannot be overheated, unlike hull-mounted weapons systems.
Thanks to its very attractive ratio of high potential DPS to cheap cost, the Catalyst is popular with suicide gankers.
Skills
Gallente ships share many core skills with the ships of the other three main factions. Very new pilots should consider EVE University's Short Skill Plan; relatively new pilots should consider the 14 skills which affect every ship, the fitting skills which make it easier to fit modules onto ships, and the support skills which underpin much of your ship's performance.
That said, there are some considerations that are specific to Gallente ships. Probably the most prominent one is the early importance of good drone skills. In particular, any Gallente pilot will want to train the "core" skill of this category, Drones, to level V quickly. Drones V is a relatively quick train compared to some advanced skills, but it's likely to be one of the first level Vs that a new Gallente pilot trains, and it will require some patience. It is worthwhile: being able to control a full flight of five drones really matters with many Gallente ships. At the latest, a pilot will want to have Drones V when they start using cruisers, as the Vexor is a fine and versatile ship.
The good news about the early investment in drone skills is that every race's ships eventually have significant dronebays, and so all pilots will one day have to polish these skills; Gallente pilots will just have a head start on others.
Gallente pilots will also want to prioritize skills for armor tanking, and capacitor skills to keep their turrets running. Any Gallente pilots with an interest in electronic warfare should look into the skills Sensor Linking, Signal Suppression, Long Distance Jamming, Frequency Modulation. A fairly new character with these skills trained even just to III or IV can have a significant battlefield impact, and they open up the road to some very powerful advanced ships such as the Keres and Lachesis.
Ships
Here are the Gallente T1 ships. Please follow the links to the specific pages of the ship database for more details.
Corvette
Little more than slower, armed shuttles, corvettes (or "noobships") are the basic frigates that new pilots start with. You can acquire a new corvette at no cost (together with a civilian weapon, a civilian mining laser, and a civilian afterburner) by clicking on the "Board my corvette" button available in the station menu when you're docked up. On their own, corvettes are useful for little other than basic errand-running, though since the ship is free a corvette can be spawned as a makeshift small station container when no other containers are available.

RELATED UNI-WIKI REFERENCES
|
S H I P B O N U S E S
Role Bonus: The Velator class corvette is one of the older vessel types in the Gallente fleet. It was first deployed on the market as a fast passenger craft but the extra passenger quarters were later modified into weapon hardpoints as the newer models came to be used for small-scale security and military duties. The Velator is still a very solid mining and trading vessel. |
A Velator can be used for the initial tutorial missions, but pilots should consider up-shipping to a T1 frigate when they can.
Frigates
Frigates are small, fast ships, used often for PvE in level 1 missions. They are also used for tackling and electronic warfare roles in PvP.

RELATED UNI-WIKI REFERENCES
|
S H I P B O N U S E S
Gallente Frigate bonuses (per skill level): The Atron is a hard nugget with an advanced power conduit system, but little space for cargo. Although it is a good harvester when it comes to mining, its main ability is as a combat vessel. |
The Atron is the Gallente Attack Frigate. It is designed to be fast and has a capacitor bonus to tackle modules and bonuses to hybrid turrets, favouring blasters. The Atron doesn't have great firepower and it still isn't the most durable of ships, but with its speed and agility, good piloting can keep it alive while tackling a target while other ships deliver the punch. Furthermore, it can serve as a level 1 mission runner until Gallente Frigate III is trained for the Incursus and Gallente Destroyer I for the Catalyst.
The Atron is a great hull for new pilots interested in learning how to +1. The agile but fragile ship will assist new pilots in understanding some of the limitations of Interceptors. It can serve as an amazing long-point tackle ship.
"Scram Chasing" might be difficult and lethal in the Atron and should be left for tankier hulls like the Incursus.
The Atron is the "fastest" T1 attack Frigate. While the Minmatar Slasher is (originally) 10m/s faster than the Atron, the three low slots allow adding an Overdrive or Nanofiber Hull resulting in a faster ship while still retaining the same tank. A large capacitor allows a stable fit relatively easily, allowing you to keep point on a target for prolonged times until your fleet or gang arrives on grid. In addition, an ample Power Grid and CPU make the Atron easy to fit with little training.

RELATED UNI-WIKI REFERENCES
|
S H I P B O N U S E S
Gallente Frigate bonuses (per skill level): The Imicus is a slow but hard-shelled frigate, ideal for any type of scouting activity. Used by merchant, miner and combat groups, the Imicus is usually relied upon as the operation's eyes and ears when traversing low security sectors. |
The Imicus is the Gallente Tech 1 exploration and scanning frigate. It is a good ship for rookies or veterans who are getting into probing and don't have the skills for the T2 version, the Helios. Its bonus to virus strength allows it to complete Data and Relic sites faster and more reliably.

RELATED UNI-WIKI REFERENCES
|
S H I P B O N U S E S
Gallente Frigate bonuses (per skill level): The Incursus may be found both spearheading and bulwarking Gallente military operations. Its speed makes it excellent for skirmishing duties, while its resilience helps it outlast its opponents on the battlefield. Incursus-class ships move together in groups and can quickly and effectively gang up on ships many times their size and overwhelm them. In recent years the Incursus has increasingly found its way into the hands of pirates, who love its aggressive appearance. |
The Incursus is the typical PvE and PvP frigate for Gallente players. It is faster and has a better scan resolution than the Tristan, which makes it better for tackling in PvP. The Incursus will likely deal more damage than a Tristan for pilots without Drones V.

RELATED UNI-WIKI REFERENCES
|
S H I P B O N U S E S
Gallente Frigate bonuses (per skill level): The Maulus is a high-tech vessel, specialized for electronic warfare. It is particularly valued in fleet warfare due to its optimization for sensor dampening technology. |
The Maulus is an electronic warfare frigate, specialized in dampening. Its low locking range makes it ineffective at range damping snipers. However, it can resolution damp effectively with the help of ECM in the fleet.

RELATED UNI-WIKI REFERENCES
|
S H I P B O N U S E S
Gallente Frigate bonuses (per skill level): In YC114 each major empire faction, having been embroiled in a harrowing, extensive, long-term war, recognized the growing need for support and logistics functionality in their vessels during the kind of protracted interstellar warfare that might otherwise prove exhausting for its participants. In the Gallente Federation, this led to the redesign and redeployment of the Navitas. |
The Navitas is the Gallente logistics frigate and is designed for remote armor repair. It makes an ideal entry point for beginner Gallente capsuleers who want to train into the Exequror, the Gallente Tier 1 logistics Cruiser, before eventually moving on to the Tier 2 Oneiros.
Note: The Navitas is designed to be self-sufficient on capacitor (i.e. to fly without the need of a cap chain) like its larger variants: the Exequror and Oneiros. However, logistics capsuleers can cross-train into the Amarr Augoror relatively easily, and from there to the T2 ![]() Guardian although both of these ships require a cap chain.
Guardian although both of these ships require a cap chain.

RELATED UNI-WIKI REFERENCES
|
S H I P B O N U S E S
Gallente Frigate bonuses (per skill level): Often nicknamed The Fat Man, this nimble little frigate is mainly used by the Federation in escort duties or on short-range patrols. The Tristan has been very popular throughout Gallente space for years because of its versatility. It is rather expensive, but buyers will definitely get their money's worth, as the Tristan is one of the more powerful frigates available on the market. |
The Tristan is an excellent frigate for PvP and PvE. It is a dedicated drone boat—the only T1 frigate that can operate 5 drones—and thus requires high drone skills to be flown effectively. It offers a bonus to both Hybrid Turret tracking speed and Drone hitpoints and tracking speed. However, it is slower and has less scan resolution than the Incursus, making it slightly worse for a dedicated tackling role in fleets.
Destroyers
Destroyers are ships slightly larger than frigates. They use the same sized modules as frigates, and they have more high slots. They are often used in PvE for Level 1 missions, and as salvaging ships for pilots that have not yet acquired a ![]() Noctis.
Noctis.

RELATED UNI-WIKI REFERENCES
|
S H I P B O N U S E S
Gallente Destroyer bonuses (per skill level): The Algos, as is custom with the Gallente, relies on swiftness of action - preferably at a respectable distance - to accomplish its goals. In this it reflects well-honed Gallente values, which include taking independent action without taking forever to wait for a committee decision, and also doing so, if at all possible, in a fashion that allows for a nice, safe buffer for immediate retreat; because theory is one thing, and practice is sometimes quite another. As such, the Algos focuses on being able to hit its targets in rapid-fire fashion, with guns that fire fast and drones that race through space with destruction in mind. |
The Algos is the second step on the Gallente drone boat path, between the Tristan and Vexor. It is slightly bulkier than the Catalyst, and since it is capable of fitting a full flight of salvage drones in addition to a rack of railguns, the Algos is an excellent choice for L1 mission running. Unlike larger ships (i.e. the Vexor), the Algos is designed to be flown with very low skill points; with that in mind, it is the only drone ship where Drones V is not an absolute necessity—although it should still be a top priority for new Gallente pilots. The Algos is a versatile destroyer, capable of running either rails or blasters while pushing through a respectable amount of DPS.

RELATED UNI-WIKI REFERENCES
|
S H I P B O N U S E S
Gallente Destroyer bonuses (per skill level): Ideally suited for both skirmish warfare and fleet support, the Catalyst is touted as one of the best anti-frigate platforms out there. Faced with its top-of-the-line tracking equipment, not many can argue. |
The Catalyst is a Gallente destroyer. Its bonuses favor blasters, though it can also be rail fit. It has 2 mids, allowing it to fit a tackle module, and 3 low slots for an armor tank. Unfortunately, the Catalyst is still a destroyer, so it has a large signature for its tank, making it vulnerable to cruiser weapons, and its slow speed and lack of mid slots means it will have difficulty dictating range against frigates, which is important for a blaster ship. A railgun fit Catalyst is a very fast L1 mission runner but has trouble tanking level 2s. The catalyst's very high damage at short range makes it the ship of choice for high sec suicide ganks, as it is able to easily reach 900 Dps with T2 guns.
Like all destroyers, the Catalyst is also a great entry-level salvager ship on a player's path to a ![]() Noctis.
Noctis.
Cruisers
Cruisers are EVE's medium-sized ships, larger than frigates and destroyers but still much smaller, faster and nimbler than battlecruisers and battleships. Cruisers mount medium-sized weapons and modules. Tech 1 cruiser hulls cost a few million ISK and tend to be the first major financial step up from frigates for new pilots.

RELATED UNI-WIKI REFERENCES
|
S H I P B O N U S E S
Gallente Cruiser bonuses (per skill level): The Celestis cruiser is a versatile ship which can be employed in a myriad of roles, making it handy for small corporations with a limited number of ships. True to Gallente style the Celestis is especially deadly in close quarters combat due to its advanced targeting systems. |
The Celestis is the Gallente EWAR cruiser. It can be made surprisingly tough for an EWAR cruiser with its 5 lows. Its extra lock range and bonus to sensor dampener range make it considerably better at range damping snipers than the smaller Maulus.

RELATED UNI-WIKI REFERENCES
|
S H I P B O N U S E S
Gallente Cruiser bonuses (per skill level): In YC114 each major empire faction, having been embroiled in a harrowing, extensive, long-term war, recognized the growing need for support and logistics functionality in their vessels during the kind of protracted interstellar warfare that might otherwise prove exhausting for its participants. Both Frigate and Cruiser-class ships were put under the microscope, and in the Gallente Federation the outcome of the re-evaluation process led, among other developments, to a redesign and redeployment of the Exequoror. |
The Exequror is the Gallente logistics cruiser. Its bonuses to remote armor repair range and power allow it to serve as a T1 armor logistic cruiser. It is an effective ship for new logistics pilots.

RELATED UNI-WIKI REFERENCES
|
S H I P B O N U S E S
Gallente Cruiser bonuses (per skill level): The Thorax-class cruiser is the latest combat ship commissioned by the Federation. While the Thorax is a very effective ship at any range, typical of modern Gallente design philosophy it is most effective when working at extreme close range where its blasters and hordes of combat drones tear through even the toughest of enemies. |
The Thorax is a gun boat, designed to use hybrid turrets. In PvP, the Thorax is used as a hard hitting blaster boat. This can be highly effective but is very "do or die", and will make most Thoraxes' lives glorious but short. In PvE, the Thorax is less popular; the slow and steady style of the Vexor is more suited to mission running. Despite this, the Thorax can be popular as a first mission running cruiser, because most pilots will have trained gunnery skills while piloting frigates and destroyers, while they will probably have neglected the drone skills required to use a Vexor effectively. Having said that, the Thorax has a 50 m3 drone bay, so will also benefit greatly from drone skills.

RELATED UNI-WIKI REFERENCES
|
S H I P B O N U S E S
Gallente Cruiser Skill Bonus: The Vexor is a strong combat ship that is also geared to operate in a variety of other roles. The Vexor is especially useful for surveying in potentially hostile sectors as it can stay on duty for a very long time before having to return to base. Furthermore, it is well capable of defending itself against even concentrated attacks. |
The Vexor, like the Myrmidon and Dominix, is a drone boat. The Vexor is an excellent mission ship, and can also be a good PvP ship. It has 75mb of drone bandwidth, allowing it to field a mixed flight of medium and heavy drones at a time, and has the drone bay to carry a few replacements or an additional flight of light drones. This gives the Vexor great flexibility for long roams, where it can carry a full flight of medium and light damage drones, as well as a flight of light repair or EWAR drones to deploy as the situation dictates. While the Vexor has a bonus to hybrid guns, this can be ignored if desired due to a large amount of the Vexor's DPS coming from drones anyway, and Vexors with autocannons, nosferatu and/or neutralisers are common. With 4 mids and 5 lows, Vexors are most often armor tanked.
The Vexor is also a great ship to use for salvaging missions as they are completed. By using 2 Salvagers, a Small Tractor Beam, a Drone Link Augmentor, and a single Hybrid Turret (to draw aggro) in the high slots a moderately drone-skilled capsuleer can securely complete level 2 missions while salvaging. Salvaging level 2 missions is debatably profitable however the salvage/mission fit Vexor can complete level 2s in respectable time when compared to a straight mission fit Vexor.
Among T1 cruisers the Vexor is a little more skill demanding than the Thorax. In particular, you should not get a Vexor unless you have at least Drones IV and should make getting Drones V a high priority.
Battlecruisers
Battlecruisers are larger, slower, and have more slots than cruisers, but they're smaller than battleships and fit the same medium-sized weapons that cruisers use. They occupy a position between cruisers and battleships analogous to destroyers' position between frigates and cruisers, although battlecruisers are much more versatile and widely used than destroyers.

RELATED UNI-WIKI REFERENCES
|
S H I P B O N U S E S
Gallente Battlecruiser bonuses (per skill level): One of the most ferocious war vessels to ever spring from Gallente starship design, the Brutix is a behemoth in every sense of the word. When this hard-hitting monster appears, the battlefield takes notice. |
The Brutix is renowned for its high DPS potential in PvP. It is also a popular suicide gank ship.
Although Gallente ships are usually better armor tanked, the Brutix benefits from a shield tank in several areas. Low slots can be dedicated to gank modules to increase DPS. The shield tank Brutix also has the advantage of being faster than an armor tank, which means it can get into the short blaster range sooner.

RELATED UNI-WIKI REFERENCES
|
S H I P B O N U S E S
Gallente Battlecruiser bonuses (per skill level): Worried that their hot-shot pilots would burn brightly in their eagerness to engage the enemy, the Federation Navy created a ship that encourages caution over foolhardiness. A hardier version of its counterpart, the Myrmidon is a ship designed to persist in battle. Its numerous medium and high slots allow it to slowly bulldoze its way through the opposition, while its massive drone space ensures that no enemy is left unscathed. |
The Myrmidon is the typical level 3 missioning ship. It can fit a passive shield tank like the Drake, but most Gallente players will focus on armor tanking skills, and its armor repair bonus makes it an excellent armor tanker.
The Myrmidon can also be an excellent PvP ship, though the damage potential is less than the Brutix with most fittings. It is sometimes used in PvP with dual or triple reps. The Myrmidon has a 100 Mb drone bandwidth. Ogres may have difficulty tracking targets smaller than battleships, and travel time can also be an issue depending on the initial engagement range. Pilots without T2 ogres may wish to use hammerheads, valkyries, warriors, and EC-300 drones in their drone bay instead.

RELATED UNI-WIKI REFERENCES
|
S H I P B O N U S E S
Gallente Battlecruiser bonuses (per skill level): The Talos began in YC 110 as an R&D concept by ORE. Conceived as a patrol craft for mining operations in lawless space, the Talos would have been abandoned completely were it not adopted by the Black Eagles, a black-ops branch of the Gallente government. The Black Eagles stripped the Talos of non-essential systems and bolted on battleship-class weapons, creating a quick-strike craft ideal for guerilla action. The Talos remained a military secret until YC 113, when it was introduced into wider circulation as a third tier battlecruiser. Today the Talos is manufactured by Duvolle Labs, who modified the original ORE designs to bring it in line with Gallente standards. |
The Talos is the Gallente Attack Battlecruiser. With damage and a tracking bonus, it focuses on blasters, providing very high DPS, but limited range. In short, it has the DPS of a Megathron and the tank of a Thorax. However, with the range of heavy blasters and the second highest speed of the Tier 3 battlecruisers a shield-tanking Talos can be an effective kiter. A very good write-up can be found on The Altruist's blog.
Battleships
Battleships ("BSs", sometimes "BBs" from US Navy terminology) are the biggest, heaviest sub-capital combat ships in the game. They are correspondingly expensive, with even the cheapest battleship hulls selling for many tens of millions of ISK. Tech 1 battleships are standard tools in PvP and PvE combat. There are two classes of Tech 2 battleships: Marauders, which are specialized for mission-running, and Black Ops battleships, which can transport fleets of stealthy ships across long distances using covert cynosural fields.

RELATED UNI-WIKI REFERENCES
|
S H I P B O N U S E S
Gallente Battleship bonuses (per skill level): The Dominix is one of the old warhorses dating back to the Gallente-Caldari War. While no longer regarded as the king of the hill, it is by no means obsolete. Its formidable hulk and powerful drone arsenal means that anyone not in the largest and latest battleships will regret ever locking horns with it. |
The Dominix (aka Domi) is one of two T1 battleship drone carriers, with a bonus to drone damage and hit points. It has the 125mb bandwidth required to field a full flight of heavy or sentry drones and a 375 m3 drone bay large enough to carry several flights of heavies, sentries, mediums, and/or lights. The Dominix's ability to choose damage types by switching drones makes it an attractive Level 4 mission runner. With its 5 mid slots and 7 low slots, the Dominix is normally armor tanked. Compared to the Amarr Armageddon, the Dominix has bonuses towards drone tracking and optimal—this helps a little with normal drones but is most useful when using sentry drones.
Since Dominixes get a lot of their damage from drones, some high slots are often used for utility modules instead of weapons. One or two drone link augmentors will be required to make the most of the Dominix's maximum range with sentries. Remote repair Dominixes are also common. The Dominix lacks a bonus towards any particular type of weapon, so which guns (if any) are fitted are up to the pilot's taste. This flexibility, along with the ability to carry utility drones such as EWAR or repair, and the low price, also make the Dominix a popular pick for PvP. For capacitor warfare in particular, however, the ![]() Armageddon has better bonuses.
Armageddon has better bonuses.
The Dominix is sometimes humorously called the "Space Potato" because of its squat and round appearance.

RELATED UNI-WIKI REFERENCES
|
S H I P B O N U S E S
Gallente Battleship bonuses (per skill level): Recognizing the necessity for a blaster platform to round out their high-end arsenal, the Federation Navy brought in top-level talent to work on the Hyperion. The result: one of the most lethal and versatile gunboats ever to take to the dark skies. |
For PvP fleets, the Hyperion doesn't get much love. In battleship fleets, remote repping is far superior, making the local rep bonus pointless. For Uni operations, it might act as a decent bait ship during lowsec patrols for pilots with too much ISK on their hands.
However, for incursions, the Hyperion is an excellent starter blaster boat. The Hyperions bonus of 10% per level of Gallente Battleship gives it good damage output for a T1 Battleship, while its 5 medium slots allow fitting a comfortable amount of shield resistances, a web, and a sensor booster for vanguard sites, or a microwarp drive for assaults or headquarter sites. Most pilots aiming to fly a Vindicator for incursions will start out flying a Hyperion.

RELATED UNI-WIKI REFERENCES
|
S H I P B O N U S E S
Gallente Battleship bonuses (per skill level): The Megathron has established itself as one of the most feared and respected battleships around. Since its first appearance almost two decades ago it has seen considerable service in the troublesome regions on the outskirts of the Federation, helping to expand and defend Gallentean influence there. |
The Megathron is one of the best PvP ships available to the Gallente. With its high amount of high slots and low slots, it can fit a sporty tank while dealing out a relatively high amount of DPS. Common setups for the Megathron include "Blaster"-throns and "Sniper"-throns, the former being a close range blaster fitted ship while the latter being a railgun fitted long range ship.
Haulers
The Gallente haulers provide tremendous flexibility in hauling. The Nereus and the Iteron Mark V are the "standard" haulers, with the Nereus focusing on speed and tank over cargo capacity, and the Iteron Mark V focusing on the opposite. The Kryos, Epithal and Miasmos are specialized haulers with massive cargo bays for specific cargo (minerals, planetary commodities, and ore, respectively).
T1 haulers are useful to transport large amounts of cargo, but they are vulnerable to suicide ganks in highsec, and piracy in lowsec. For war time hauling, a hauling alt is recommended. See the Creating an Alt Hauler article for more information.

RELATED UNI-WIKI REFERENCES
|
S H I P B O N U S E S
Gallente Hauler bonuses (per skill level): Originally set to sail under the guise of "Iteron", this new iteration of an old stalwart is fast and reliable. It is equally popular among civilians and militaries due to its low price and ability to be fitted in myriad different ways. Despite its speed and resilience, however, it may need to be guarded while in particularly unfriendly territories, which is why it has also been outfitted with a drone bay for extra protection. |
The Nereus is the agile, tanked Gallente hauler. Its cargo hold can expand to 11,372 m3 (no rigs), its align time can be reduced to 3.6 s, with a warp speed of 4.5 AU/s.

RELATED UNI-WIKI REFERENCES
|
S H I P B O N U S E S
Gallente Hauler bonuses (per skill level): Aside from being endowed with the usual hauling capabilities of haulers, the Kryos possesses two extra cargo bays. They are both equipped with precise temperature and pressure controls; the first is celebrated specifically for ferrying minerals, while the second is calibrated at the extremely low temperatures required for harvested cosmic ice. The Kryos was originally designed as a variant of the Iteron, but eventually evolved to perform an entirely separate role. |
The Kryos was changed from Iteron Mark II with the deployment of the Odyssey 1.1 patch. Its cargo hold was reduced in size and a dedicated mineral bay was added.

RELATED UNI-WIKI REFERENCES
|
S H I P B O N U S E S
Gallente Hauler bonuses (per skill level): Aside from being endowed with the usual carrying capabilities of haulers, the Epithal possesses two extra cargo bays. The Planetary Commodities Hold is equipped with sealed sub-chambers capable of maintaining hospitable environments for practically any kind of organism or entity, from biocells to viral agents, and is meant solely for ferrying planetary commodities. The Command Center Hold is equipped to handle up to six Command Centers at one time. The Epithal was originally designed as a variant of the Iteron, but eventually evolved to perform an entirely separate role. |
The Epithal was known as the Iteron Mark III prior to the deployment of Odyssey 1.1. Its cargo hold was reduced in size and a bay was added for hauling planetary industry (PI) materials or planetary commodities.

RELATED UNI-WIKI REFERENCES
|
S H I P B O N U S E S
Gallente Hauler bonuses (per skill level): Aside from being endowed with the usual hauling capabilities of Haulers, the Miasmos possesses an extra cargo bay. That bay is equipped with sealed, temperature-controlled vats, and is meant solely for ferrying all types of interstellar ore: ice, gasses and asteroids. The Miasmos was originally designed as a variant of the Iteron, but eventually evolved to perform an entirely separate role. |
The Miasmos is designed to haul raw ore in large amounts.

RELATED UNI-WIKI REFERENCES
|
S H I P B O N U S E S
Gallente Hauler bonuses (per skill level): This lumbering giant is the latest and last iteration in a chain of haulers. It is the only one to retain the original "Iteron"-class callsign, but while all the others eventually evolved into specialized versions, the Iteron Mk. V still does what haulers do best: Transporting enormous amounts of goods and commodities between the stars. |
With the Odyssey 1.0 expansion, the Iteron V was the largest T1 hauler available. However, the Odyssey 1.1 industrial rebalance gave the Bestower the highest potential cargo, the Mammoth the fastest travel time, the Tayra a launcher and highest base cargohold, and made the Iteron Mark V average all-around due to the conversion of the Iteron Mark 2/3/4 into specialized ships for minerals, planetary commodities and ore. [1]
Hybrid turret ammo tips
- Main article: Hybrid Ammo
Different kinds of hybrid turret ammunition carry different trade-offs in range, capacitor use, and damage. Antimatter requires the most capacitor, has the shortest range, and does the most damage. Lead requires the least capacitor, has no range modifier, and does middling damage. Iron has the longest range and the least damage.
In PvE combat, pilots could consider carrying 3 types of ammo, and switch when required. By default, close range (Antimatter or Plutonium) ammo should be used. If you are taking too much damage at close range, switch to medium range (Lead or Thorium) or long range (Iron or Tungsten) ammo, and fire from further away.
For PvP, faction Antimatter ammunition and T2 Null are used for brawling with blasters, while sniping railguns often use T2 Spike (rails).
Drone tips
- Main article: Drone mechanics
Small drones should be used against frigate-sized enemies, medium drones should be used against cruiser-sized enemies, and heavy drones should be used against battleship-sized enemies. Sentries are mostly meant for battleship-sized enemies, but if smaller enemies are far enough that tracking and signature radius isn't an issue, they can deal relatively well with those.
All four races' drones are viable in PvE and you should select drones that deal the damage type which your target NPCs are weakest.
Watch out for enemies attacking your drones. If you're in a dedicated drone boat and see your drones taking damage, recall them: they are your main weapon and you don't want to be defanged. In PvE combat, try to get the NPCs to attack you before you launch your drones.
Keyboard / auxiliary mouse button shortcuts are recommended for drone management. Shortcuts can be set for attack and return to drone bay commands. One group of drones in the drone window can be designated as your "favorite", and a button can be assigned to the command "launch favorite group of drones".
In general, it is better to keep drones in Passive mode. In missions and wormholes, drones set to Aggressive can trigger a new wave earlier than desired. In PvP, drones set to Aggressive can give you an unwanted weapon timer which then prevents you from docking up or jumping through a gate to safety.
Related links
- Basic skills and Support skills - Training support skills is a key step towards flying a ship well. Read up on support skills here.
- Fitting Guidelines - Some general guidelines for fitting ships.
- Fitting Modules and Rigs Guide - A list of rigs and module types with short descriptions.
- NPC damage types and NPC Ship Attributes - To see which resists to use and damage types to deal against NPC rats.
- Creating an Alt Hauler - Having an alt hauler can be useful for shopping trips during wartime, if you are living in highsec.
Template:FittingsTemplate:FittingsTemplate:FittingsTemplate:Fittings
Tactics
No sub-article about Vexor roles or piloting tactics. You can write them here.
Notes
This vessel qualifies for the University Ship Replacement, PYOS, BYOM, and Mining Loaner Fleet programs.


