More actions
removed the update box. |
Drebin 679 (talk | contribs) →Subsystems: Updated tables to match other T3C subsystem tables (would probably need some extra formatting), separating additional base stats to a separate column, coloring subsystem names, and adding subsystem icons. |
||
| Line 115: | Line 115: | ||
Like other Strategic Cruisers, many of the stats of the Tengu are determined by what subsystems are installed. The Tengu requires a susbsystem from each of the Core, Defensive, Offensive, and Propulsion subsystems. Each category has three options, offering different bonuses and stats to the Tengu. | Like other Strategic Cruisers, many of the stats of the Tengu are determined by what subsystems are installed. The Tengu requires a susbsystem from each of the Core, Defensive, Offensive, and Propulsion subsystems. Each category has three options, offering different bonuses and stats to the Tengu. | ||
==== Core | ==== [[File:Icon_core_subsystem.png|32px|link=]] Core ==== | ||
{| class="wikitable collapsible collapsed" | {| class="wikitable collapsible collapsed" | ||
|- | |- | ||
! Name !! Caldari Core Systems bonuses (per skill level) !! Role Bonus | ! Name !! Caldari Core Systems bonuses (per skill level) !! Role Bonus !! Additional Base Stats | ||
|- | |- | ||
| Augmented Graviton Reactor || <b>5%</b> bonus to capacitor capacity<br><b>3%</b> bonus to energy warfare resistance|| 20% bonus to ship power output | | '''{{co|wheat|Augmented Graviton Reactor}}''' || <b>5%</b> bonus to capacitor capacity<br><b>3%</b> bonus to energy warfare resistance || 20% bonus to ship power output || +2 mid slots, +2 low slots<br>+50GJ Capacitor | ||
|- | |- | ||
| Electronic Efficiency Gate || <b>15%</b> bonus to ship sensor strength<br><b>5%</b> bonus to max targeting range|| 25% bonus to ship CPU output | | '''{{co|wheat|Electronic Efficiency Gate}}''' || <b>15%</b> bonus to ship sensor strength<br><b>5%</b> bonus to max targeting range || 25% bonus to ship CPU output || +3 Mid Slots, +1 Low Slot<br>+1 max locked target | ||
|- | |- | ||
| Obfuscation Manifold || <b>10%</b> bonus to ECM Target Jammer strength and optimal range<br><b>15%</b> bonus to the benefits of overheating ECM Target Jammer modules<br><b>5%</b> reduction in module damage from overheating|| +3 Mid Slots, +1 Low Slot | | '''{{co|wheat|Obfuscation Manifold}}''' || <b>10%</b> bonus to ECM Target Jammer strength and optimal range<br><b>15%</b> bonus to the benefits of overheating ECM Target Jammer modules<br><b>5%</b> reduction in module damage from overheating || || +3 Mid Slots, +1 Low Slot | ||
|} | |} | ||
==== Defensive | ==== [[File:Icon_defensive_subsystem.png|32px|link=]] Defensive ==== | ||
{| class="wikitable collapsible collapsed" | {| class="wikitable collapsible collapsed" | ||
|- | |- | ||
! Name !! Caldari Defensive Systems bonuses (per skill level) !! Role Bonus | ! Name !! Caldari Defensive Systems bonuses (per skill level) !! Role Bonus !! Additional Base Stats | ||
|- | |- | ||
| Amplification Node || <b>10%</b> bonus to Shield Booster effectiveness<br><b>10%</b> bonus to the benefits of overheating Shield Boosters || +3 Mid Slots, +1 Low Slot<br>+500 Shield HP, +100 Armor HP<br>+300GJ Capacitor Capacity | | '''{{co|wheat|Amplification Node}}''' || <b>10%</b> bonus to Shield Booster effectiveness<br><b>10%</b> bonus to the benefits of overheating Shield Boosters || || +3 Mid Slots, +1 Low Slot<br>+500 Shield HP, +100 Armor HP<br>+300GJ Capacitor Capacity | ||
|- | |- | ||
| Covert Reconfiguration || <b>10%</b> bonus to Core and Combat Scanner Probe strength<br><b>7.5%</b> bonus to Shield Booster effectiveness<br><b>7.5%</b> bonus to the benefits of overheating Shield Boosters||100% reduction in Cloaking Devices CPU requirement<br>10+ bonus to Relic and Data Analyzer virus strength<br>Can fit Covert Ops Cloaking Device and Covert Cynosural Field Generator<br>Cloak reactivation delay reduced to 5 seconds | | '''{{co|wheat|Covert Reconfiguration}} || <b>10%</b> bonus to Core and Combat Scanner Probe strength<br><b>7.5%</b> bonus to Shield Booster effectiveness<br><b>7.5%</b> bonus to the benefits of overheating Shield Boosters|| 100% reduction in Cloaking Devices CPU requirement<br>10+ bonus to Relic and Data Analyzer virus strength<br>Can fit Covert Ops Cloaking Device and Covert Cynosural Field Generator<br>Cloak reactivation delay reduced to 5 seconds || +1 High Slot, +3 Mid Slots<br>+300 Armor HP, +600 Hull HP<br>+200GJ Capacitor Capacity, +5m Signature Radius, +30m3 Cargo Capacity | ||
|- | |- | ||
| Supplemental Screening || | | '''{{co|wheat|Supplemental Screening}} || <b>5%</b> bonus to all shield hitpoints<br><b>5%</b> bonus to the benefits of overheating shield hardeners || || +2 Mid Slots, +2 Low Slots<br>+1000 Shield HP<br>+10m Signature Radius | ||
<b>5%</b> bonus to all shield hitpoints<br> | |||
<b>5%</b> bonus to the benefits of overheating shield hardeners | |||
||+2 Mid Slots, +2 Low Slots<br>+1000 Shield HP<br>+10m Signature Radius | |||
|} | |} | ||
==== Offensive | ==== [[File:Icon_offensive_subsystem.png|32px|link=]] Offensive ==== | ||
{| class="wikitable collapsible collapsed" | {| class="wikitable collapsible collapsed" | ||
|- | |- | ||
! Name !! Caldari Offensive Systems bonuses (per skill level) !! Role Bonus | ! Name !! Caldari Offensive Systems bonuses (per skill level) !! Role Bonus !! Additional Base Stats | ||
|- | |- | ||
| Accelerated Ejection Bay || <b>5%</b> bonus to kinetic Light Missile, Heavy Missile and Heavy Assault Missile damage<br><b>7.5%</b> bonus to Rapid Light Missile, Heavy Missile and Heavy Assault Missile Launcher rate of fire<br><b>10%</b> bonus to Heavy Missile and Heavy Assault Missile velocity || | | '''{{co|wheat|Accelerated Ejection Bay}}''' || <b>5%</b> bonus to kinetic Light Missile, Heavy Missile and Heavy Assault Missile damage<br><b>7.5%</b> bonus to Rapid Light Missile, Heavy Missile and Heavy Assault Missile Launcher rate of fire<br><b>10%</b> bonus to Heavy Missile and Heavy Assault Missile velocity || || +7 High Slots, +6 Launcher Hardpoints<br>+190 PWG, +160 CPU | ||
+7 High Slots, +6 Launcher Hardpoints<br>+190 PWG, +160 CPU | |||
|- | |- | ||
| Magnetic Infusion Basin || <b>5%</b> bonus to Medium Hybrid Turret damage<br><b>20%</b> bonus to Medium Hybrid Turret optimal range||25% reduction in the PWG and CPU fitting costs of Medium Hybrid Turrets | | '''{{co|wheat|Magnetic Infusion Basin}}''' || <b>5%</b> bonus to Medium Hybrid Turret damage<br><b>20%</b> bonus to Medium Hybrid Turret optimal range || 25% reduction in the PWG and CPU fitting costs of Medium Hybrid Turrets || +7 High Slots, +6 Turret Hardpoints<br>+420 PWG, +120 CPU<br>+100GJ Capacitor Capacity | ||
|- | |- | ||
| Support Processor || <b>2%</b> bonus to Shield Command, Information Command and Skirmish Command burst strength and duration<br><b>5%</b> reduction in Remote Shield Booster activation cost<br><b>10%</b> bonus to the benefits of overheating Remote Shield Booster modules||75% reduction in the PWG and CPU fitting costs of Medium Remote Shield Booster modules<br>95% reduction in the PWG and CPU fitting costs of Command Burst modules<br>475% bonus to Remote Shield Booster falloff<br>Can use one Command Burst module<br>50% bonus to Command Burst area of effect range | | '''{{co|wheat|Support Processor}}''' || <b>2%</b> bonus to Shield Command, Information Command and Skirmish Command burst strength and duration<br><b>5%</b> reduction in Remote Shield Booster activation cost<br><b>10%</b> bonus to the benefits of overheating Remote Shield Booster modules || 75% reduction in the PWG and CPU fitting costs of Medium Remote Shield Booster modules<br>95% reduction in the PWG and CPU fitting costs of Command Burst modules<br>475% bonus to Remote Shield Booster falloff<br>Can use one Command Burst module<br>50% bonus to Command Burst area of effect range || +7 High Slots, +4 Launcher Hardpoints<br>+100GJ Capacitor Capacity<br>+25mbit Drone Bandwidth, +50m3 Drone Bay<br>+1 max locked target | ||
|} | |} | ||
==== Propulsion | ==== [[File:Icon_propulsion_subsystem.png|32px|link=]] Propulsion ==== | ||
{| class="wikitable collapsible collapsed" | {| class="wikitable collapsible collapsed" | ||
|- | |- | ||
! Name !! Caldari Propulsion Systems bonuses (per skill level) !! Role Bonus | ! Name !! Caldari Propulsion Systems bonuses (per skill level) !! Role Bonus !! Additional Base Stats | ||
|- | |- | ||
| Chassis Optimization || <b>7.5%</b> bonus to ship agility<br><b>3%</b> bonus to max velocity || +1 Mid Slot, +1 Low Slot | | '''{{co|wheat|Chassis Optimization}}''' || <b>7.5%</b> bonus to ship agility<br><b>3%</b> bonus to max velocity || || +1 Mid Slot, +1 Low Slot | ||
|- | |- | ||
| Fuel Catalyst || <b>10%</b> bonus to Afterburner velocity bonus<br><b>10%</b> bonus to the benefits of overheating Afterburners and Microwarpdrives||+2 Mid Slots | | '''{{co|wheat|Fuel Catalyst}}''' || <b>10%</b> bonus to Afterburner velocity bonus<br><b>10%</b> bonus to the benefits of overheating Afterburners and Microwarpdrives || || +2 Mid Slots | ||
|- | |- | ||
| Interdiction Nullifier || <b>10%</b> bonus to warp velocity and acceleration<br><b>15%</b> reduction in capacitor need when initiating warp||Immunity to non-targeted interdiction | | '''{{co|wheat|Interdiction Nullifier}}''' || <b>10%</b> bonus to warp velocity and acceleration<br><b>15%</b> reduction in capacitor need when initiating warp || Immunity to non-targeted interdiction || +1 Low Slot<br>+0.1 Inertia Modifier<br>-20km Max Targeting Range<br>+20m Signature Radius | ||
|} | |} | ||
Revision as of 08:07, 22 May 2020

RELATED UNI-WIKI REFERENCES
|
When we first saw the flock, we were surrounded, caught in a spectacle of stimuli. Brilliant colors, dancing lights, beautiful cacophonies, wafting ambrosia. Those birds surrounded us, each one a different shape, an altered species, a new wonder. I tried to follow a single bird, but my efforts were futile: Transformation is natural to their existence. Imagine it: an undulating mass, a changing mob, all those beasts partaking in wonderful transmogrification. SHIP BONUSES
Caldari Defensive Systems bonuses (per skill level):
Ship Attributes
|
Summary
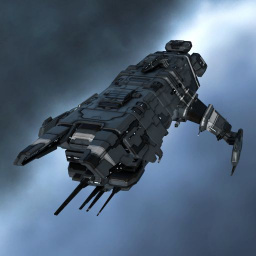
The Tengu is the Caldari Strategic Cruiser. As such the Tengu is a very flexible and its stats are mostly defined by the susbsystems. Those are heavily bonused for shield tanking. The Tengu is the strategic cruiser most popular for PvE. It's advantage is the choosable damage through missiles and the strong shield tank which leaves the low slots free for DPS. At the same time it can refit to cloaky and nully, which allows to savely travel to PvE locations even in nullsec. The Tengu is regularly used in solo PvP. Here it profits again from its strong shield tank. In fleet PvP it mostly fills niche roles. It can be a good command burst platform in fleets where Command Ships can't reach the required speed but Command Destroyers are not tanky enough. It's also a popular choice for BLOPs hunting; in this role you use the covert subsystem so you can use a covert cyno and are also often nullified so you can get to targets in hostile territory.
Skills
- Caldari Offensive Systems and Caldari Defensive Systems to V because they greatly improve the Tengu's performance. Caldari Core Systems V is especially useful for ECMgus. The other subsystem skills should only be taken to V when needed to reduce SP loss when losing the ship in combat.
- Heavy Missiles V, Heavy Assault Missiles V, and Heavy Missile Specialization/Heavy Assault Missile Specialization to at least I to fit T2 Launchers, which do more damage and are substantially cheaper than meta 4 variants, along with the ability to use T2 ammo types.
- Missile Launcher Operation, Rapid Launch, Warhead Upgrades, skills which increase DPS and are thus vital to all missile-based damage dealing ships, should all be trained to at least IV.
- Along with the requisite Engineering and Electronic Systems skills required for adequately fitting most ships. Weapon upgrades and Advanced Weapon Upgrades should be trained to V and IV respectively to help alleviate fitting problems.
- Guided Missile Precision and Target Navigation Prediction to at least IV to combat smaller targets.
- Missile Projection and Missile Bombardment to at least IV and ideally V to maximize the range at which all missiles travel.
- Caldari Strategic Cruiser to IV to reduce the damage incurred from overheating modules.
- Shield Operation and Shield Management should be trained to at least IV to improve shield capacity and recharge rate. While Tactical Shield Manipulation should be trained to IV to lower shield penetration chance and Shield Management to V to allow the use of the T2 Shield Boost Amplifier module.
- Shield Upgrades should be trained to IV to allow the use of T2 Shield Hardeners, Resistance Amplifiers, Shield Boosters, Shield Power Relays, Shield Extenders and Shield Rechargers.
- Finally, Hull Upgrades should be trained to level IV to allow use of the T2 Damage Control module.
Fitting
For more info on fittings, please go here
Tactics
Tengus are used for a doctrine called "Slippery Petes". These Tengus are run nullified to ignore bubbles, with ECCM in the low slots to make them difficult to probe down and tackle. In fact, you need a bonused ship and a full set of Virtue implants to probe Petes! Petes are also fit with railguns, and are designed to warp in at extreme ranges, take potshots at key ships such as logistics and the Fleet Commander, and warp out before they can be caught. This doctrine is especially popular to third party on big fights.
Subsystems
Like other Strategic Cruisers, many of the stats of the Tengu are determined by what subsystems are installed. The Tengu requires a susbsystem from each of the Core, Defensive, Offensive, and Propulsion subsystems. Each category has three options, offering different bonuses and stats to the Tengu.
 Core
Core
| Name | Caldari Core Systems bonuses (per skill level) | Role Bonus | Additional Base Stats |
|---|---|---|---|
| Augmented Graviton Reactor | 5% bonus to capacitor capacity 3% bonus to energy warfare resistance |
20% bonus to ship power output | +2 mid slots, +2 low slots +50GJ Capacitor |
| Electronic Efficiency Gate | 15% bonus to ship sensor strength 5% bonus to max targeting range |
25% bonus to ship CPU output | +3 Mid Slots, +1 Low Slot +1 max locked target |
| Obfuscation Manifold | 10% bonus to ECM Target Jammer strength and optimal range 15% bonus to the benefits of overheating ECM Target Jammer modules 5% reduction in module damage from overheating |
+3 Mid Slots, +1 Low Slot |
 Defensive
| Name | Caldari Defensive Systems bonuses (per skill level) | Role Bonus | Additional Base Stats |
|---|---|---|---|
| Amplification Node | 10% bonus to Shield Booster effectiveness 10% bonus to the benefits of overheating Shield Boosters |
+3 Mid Slots, +1 Low Slot +500 Shield HP, +100 Armor HP +300GJ Capacitor Capacity | |
| Covert Reconfiguration | 10% bonus to Core and Combat Scanner Probe strength 7.5% bonus to Shield Booster effectiveness 7.5% bonus to the benefits of overheating Shield Boosters |
100% reduction in Cloaking Devices CPU requirement 10+ bonus to Relic and Data Analyzer virus strength Can fit Covert Ops Cloaking Device and Covert Cynosural Field Generator Cloak reactivation delay reduced to 5 seconds |
+1 High Slot, +3 Mid Slots +300 Armor HP, +600 Hull HP +200GJ Capacitor Capacity, +5m Signature Radius, +30m3 Cargo Capacity |
| Supplemental Screening | 5% bonus to all shield hitpoints 5% bonus to the benefits of overheating shield hardeners |
+2 Mid Slots, +2 Low Slots +1000 Shield HP +10m Signature Radius |
 Offensive
| Name | Caldari Offensive Systems bonuses (per skill level) | Role Bonus | Additional Base Stats |
|---|---|---|---|
| Accelerated Ejection Bay | 5% bonus to kinetic Light Missile, Heavy Missile and Heavy Assault Missile damage 7.5% bonus to Rapid Light Missile, Heavy Missile and Heavy Assault Missile Launcher rate of fire 10% bonus to Heavy Missile and Heavy Assault Missile velocity |
+7 High Slots, +6 Launcher Hardpoints +190 PWG, +160 CPU | |
| Magnetic Infusion Basin | 5% bonus to Medium Hybrid Turret damage 20% bonus to Medium Hybrid Turret optimal range |
25% reduction in the PWG and CPU fitting costs of Medium Hybrid Turrets | +7 High Slots, +6 Turret Hardpoints +420 PWG, +120 CPU +100GJ Capacitor Capacity |
| Support Processor | 2% bonus to Shield Command, Information Command and Skirmish Command burst strength and duration 5% reduction in Remote Shield Booster activation cost 10% bonus to the benefits of overheating Remote Shield Booster modules |
75% reduction in the PWG and CPU fitting costs of Medium Remote Shield Booster modules 95% reduction in the PWG and CPU fitting costs of Command Burst modules 475% bonus to Remote Shield Booster falloff Can use one Command Burst module 50% bonus to Command Burst area of effect range |
+7 High Slots, +4 Launcher Hardpoints +100GJ Capacitor Capacity +25mbit Drone Bandwidth, +50m3 Drone Bay +1 max locked target |
 Propulsion
| Name | Caldari Propulsion Systems bonuses (per skill level) | Role Bonus | Additional Base Stats |
|---|---|---|---|
| Chassis Optimization | 7.5% bonus to ship agility 3% bonus to max velocity |
+1 Mid Slot, +1 Low Slot | |
| Fuel Catalyst | 10% bonus to Afterburner velocity bonus 10% bonus to the benefits of overheating Afterburners and Microwarpdrives |
+2 Mid Slots | |
| Interdiction Nullifier | 10% bonus to warp velocity and acceleration 15% reduction in capacitor need when initiating warp |
Immunity to non-targeted interdiction | +1 Low Slot +0.1 Inertia Modifier -20km Max Targeting Range +20m Signature Radius |
Notes
You can write additional notes for Tengu here.
Patch History
| A long, long time ago... |
|---|
|
October 2019 Release - 2019-10-15.1 Every Cruiser, Battlecruiser and Battleship now warps faster than before.
July 2017 Release - Released 2017-07-11
|


